For those of you keyboard enthusiasts who love to try out new switches, but don’t have the equipment or skills to solder, a hot-swappable keyboard can be a lifesaver. With a hot-swappable keyboard swapping out switches is a super-fast and easy process, so we’ll show you exactly how to do it.
The four steps to replacing your hot-swappable switches:
- Step 1: Remove the keycaps with a keycap puller.
- Step 2: Remove the switches with the switch puller.
- Step 3: Gently press new switches into PCB.
- Step 4: Plug in the keyboard and test!
We’ll go over all of the steps in more detail and explain exactly what to mistakes to look out for, so keep reading!
What is a Hot-Swappable Keyboard?

Before digging into the steps, let’s go over exactly what a hot-swappable keyboard is. On a traditional mechanical keyboard, each of the switches are soldered to the PCB to secure the connection. The solder holds the switches onto the PCB, so to install new switches, you would have to remove the solder and then re-solder the new switches to the PCB.
With a hot-swappable keyboard, the switches are not soldered, instead they are held in place by the hot-swappable sockets on the keyboard. A keyboard with hot-swap functionality is much easier to remove and replace the switches on, because you do not need to solder or de-solder the switches. Instead, you simply pull the switches out and push the new ones into the hot swap sockets.
For those that lack the space, time, or equipment to solder, a hot-swappable keyboard is my recommended choice. It can be a blast to order a switch tester online and try out all of the different switches to figure out what kind switch you prefer.
Are your Switches Compatible with a Hot-Swap Keyboard?
When it comes to the switch design, almost all are switches compatible with a hot-swappable keyboard. Basically, any Cherry MX switch or clone will be compatible with a hot-swappable keyboard, which makes it super easy to test several different switch types to see what actuation type and actuation force you prefer the most. When purchasing new switches there is really only one thing you’ll need to look at and that is if the switches are 5-pin or 3-pin.
5 Pin vs 3 Pin Switches
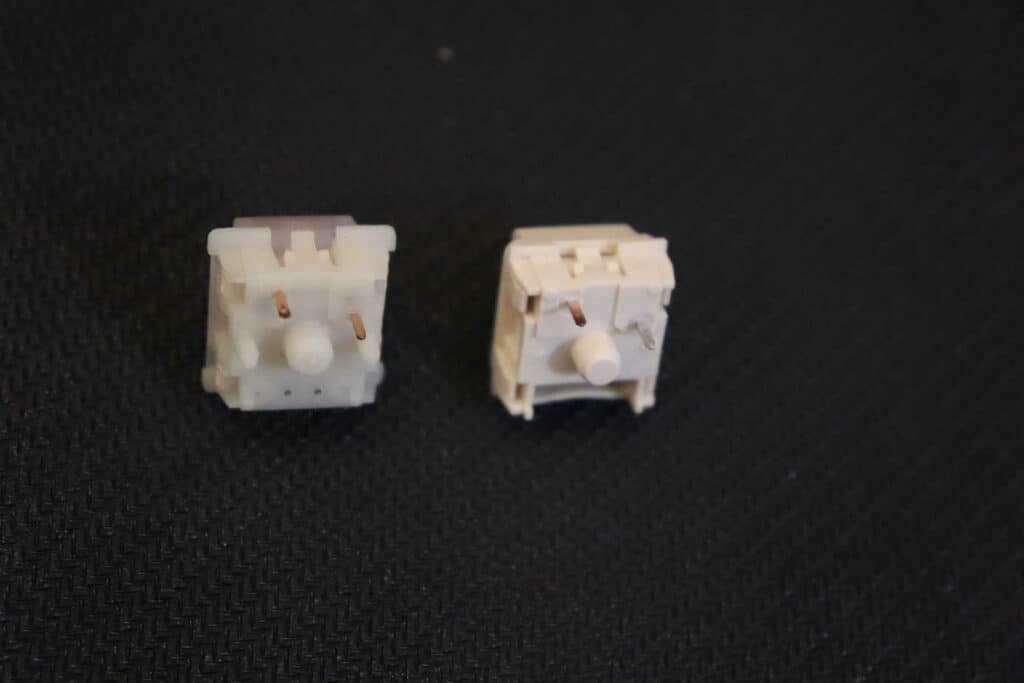
Each switch will usually come with two metal pins on the bottom, along with a larger circular plastic pin. These parts will slide into the PCB and hold the switches in place to keep them from wobbling or falling out. The switch design that only has the one circular pin and two metal pins is referred to as a 3-pin switch. In addition to 3-pin, there is also a 5-pin design that comes with two additional plastic pegs to help secure the switch to the PCB better.
Hot-swappable keyboards typically come in a 5-pin or 3-pin design as well. With a 5-pin design, all switches will be compatible with the keyboard, regardless of if the switches are 3-pin or 5-pin. On a 3-pin hot-swappable keyboard, however, only 3-pin switches will work. Luckily, there is a way to convert 5-pin switches to 3-pin, and the process is pretty simple.
Converting a 5-Pin Switch to 3-Pin
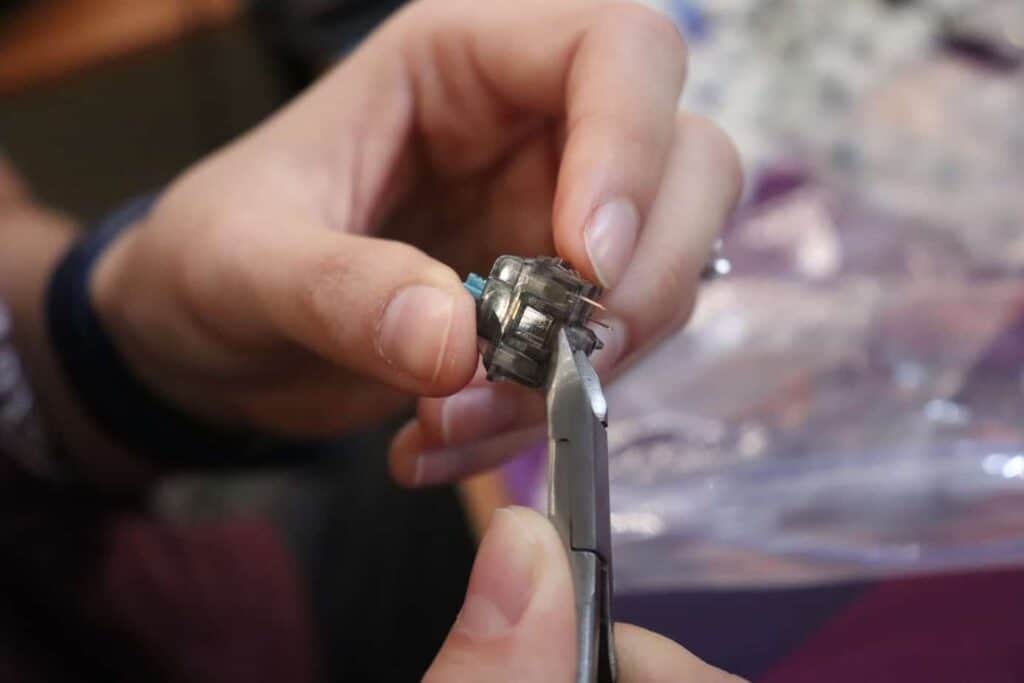
To convert a 5-pin switch to 3-pin, you’ll simply need to clip the two extra plastic legs on the bottom of the switch. We typically use flush cutters for the cleanest cut, but nail clippers could work if you’re extra careful. You want to cut the plastic legs off as close the bottom of the switch as possible, so there is no stub left over after cutting. After that, you’re done! The 5-pin switch is now converted to a 3-pin, and should be compatible with any hot-swappable keyboard.
How to Remove & Install Switches on a Hot-Swappable Keyboard
Removing switches from a hot-swappable keyboard is a pretty simple process, there are just a few steps you’ll need to be careful on to avoid damaging your keyboard. You’ll also need a few tools at the ready to remove and replace the switches properly.
Tools Required
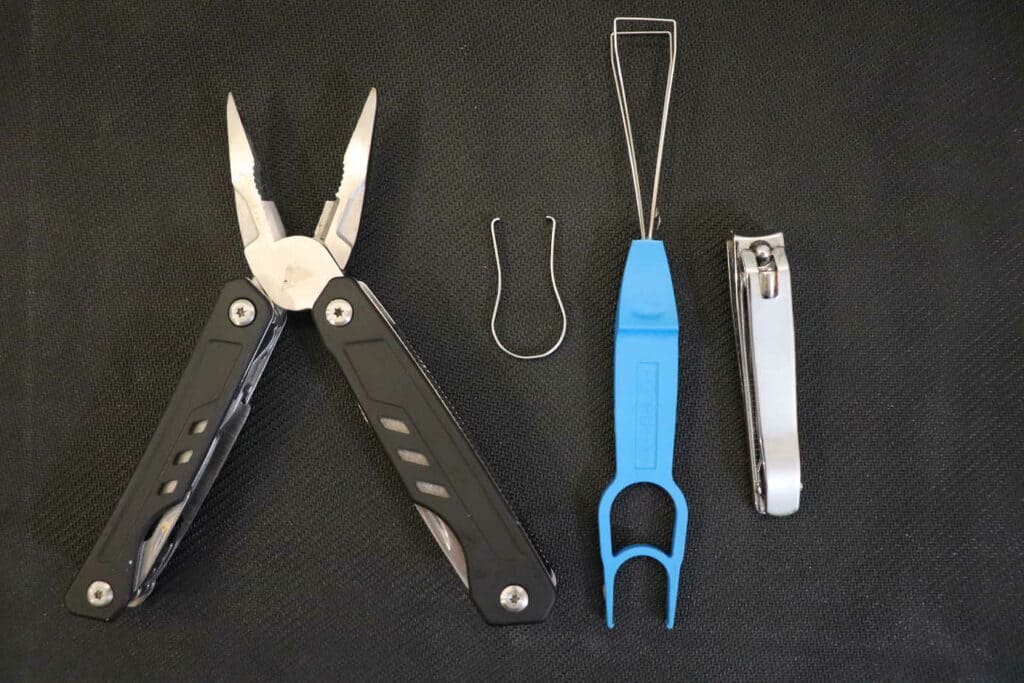
- Keycap Puller
- Switch Puller
- Pliers
- Clippers (if you need to clip pins)
Step 1: Remove the Keycaps with a Keycap Puller
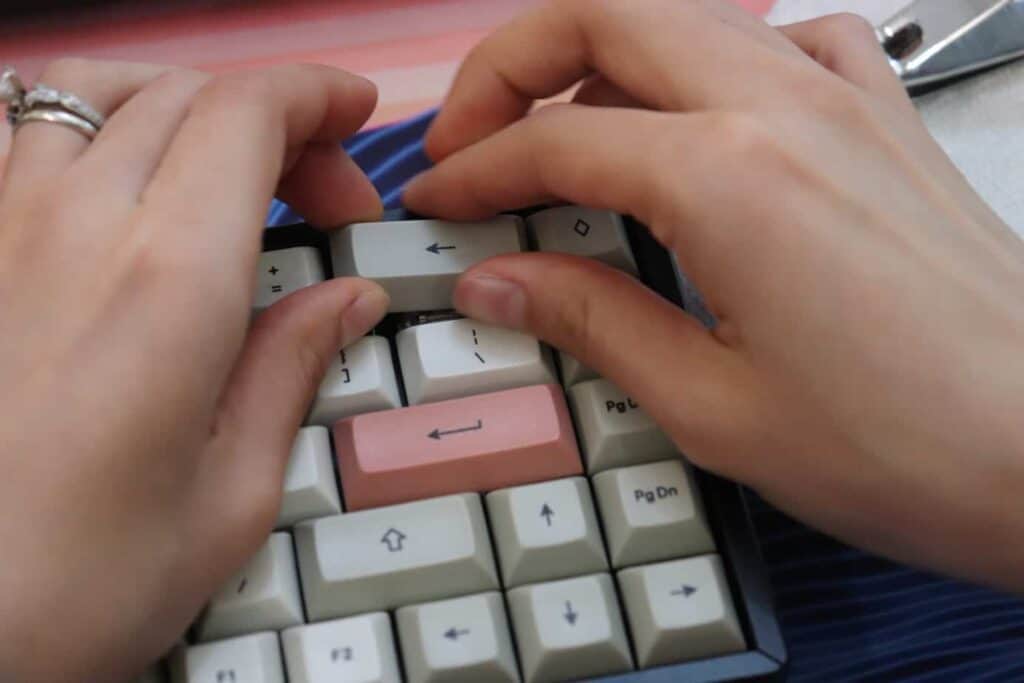
For the first step you’ll need to pull off the keycaps to get access to the switches on your keyboard. We typically use a keycap puller to remove the keycaps. When removing the keycaps, it’s always a good idea not to yank the keycaps off, but instead gently pull and slowly wiggle the keycaps off with the keycap puller. It’s possible to damage the switches by ruining the stem during this process, so avoid yanking the keycaps off too fast.
Step 2: Remove the Switches with the Switch Puller
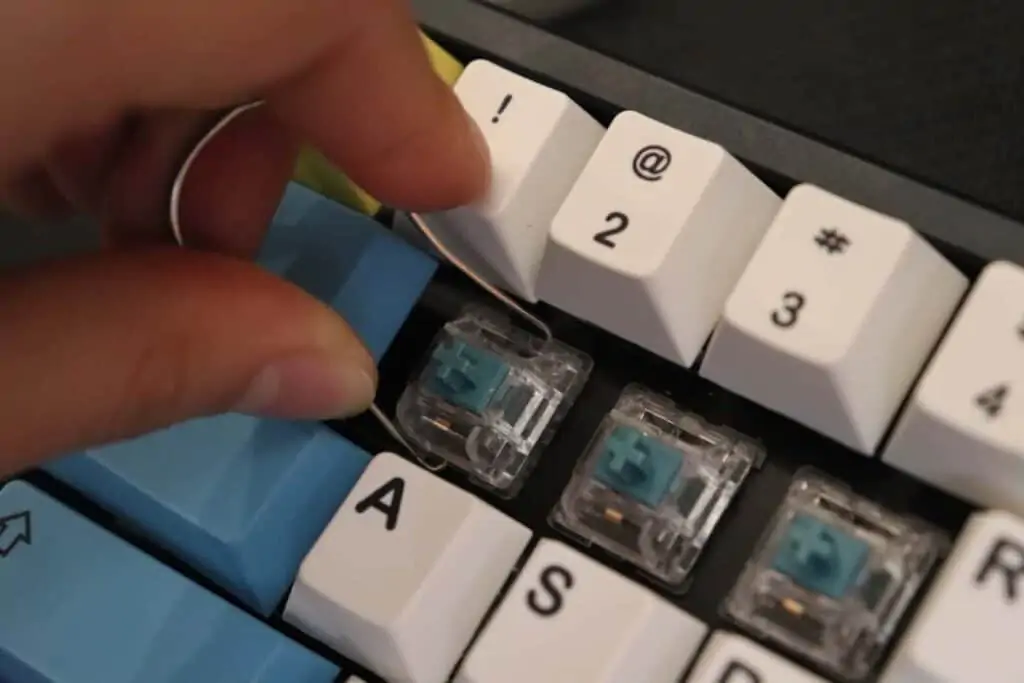
Now that the keycaps are off, you should be able to remove the switches by using a switch puller. There is a technique to this process, with the switch puller you want to use the ends to hook underneath the switches and push down on the two plastic tabs on the side of the switch. Once you are pressing down on the plastics tabs, you should be able to pull the switches out the keyboard.
Similar to the keycaps, avoid yanking the switches out. Instead, gently pull and wiggle the switches out until free. It’s possible to break the metal prongs inside the hot-swap sockets if you’re not careful, in which case the switch will ruined, and the keyboard will be difficult to fix.
Step 3: Install the New Switches
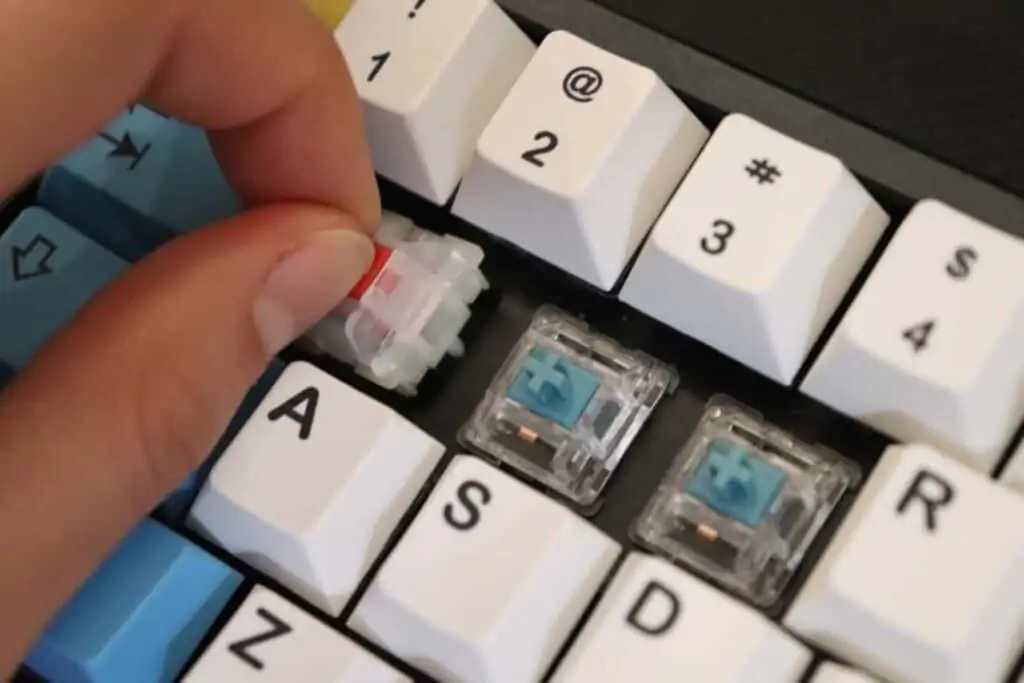
Now that all of the original switches have been removed, it’s time to install the new switches into the keyboard. There are few things to look out for during this process. You’ll need to line-up the switch pins with the sockets on the keyboard, and then gently press down until the switches glide into place. The switches should settle into the keyboard and be properly secured if everything was lined up properly. It’s possible and pretty common to bend the metal pins during this process, so we’ll go over how to fix this issue for later. For now, just install each switch as carefully as possible.
Step 4: Plug in Keyboard and Test!
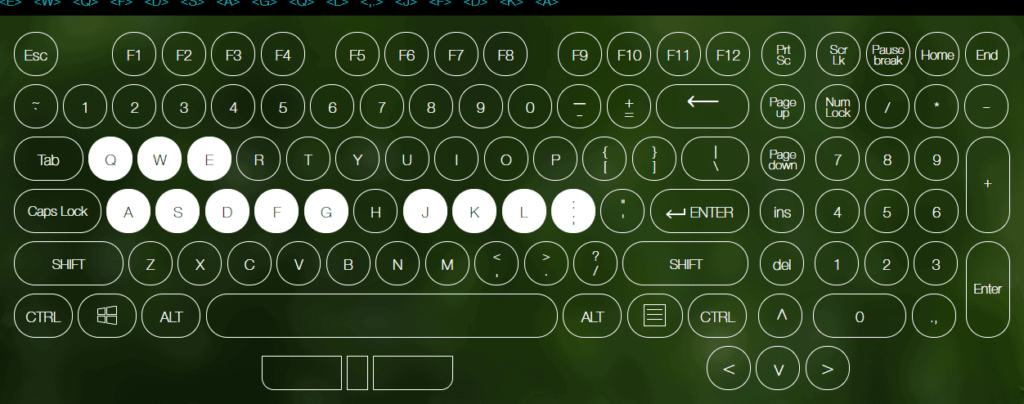
At this point all of the switches should be installed into the keyboard, but before putting the keycaps back on, it’s time to check how successful you were during the installation process. We like to use this free online tester that you can operate inside your browser. With the key tester, you want to press down every key on your keyboard and see if it lights up in the program. There might be a few keys that don’t light up, but don’t worry! It’s most likely one of the pins bent during the switch installation process. We’ll go over how to fix this issue.
Fixing a Bent Pin
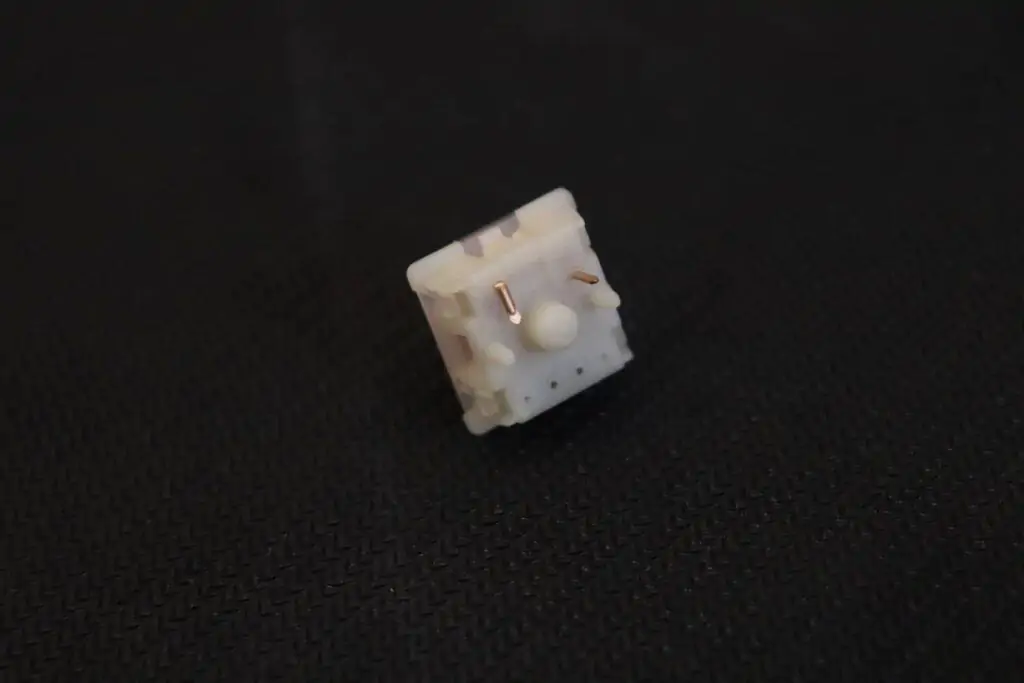
When swapping out switches on a keyboard, usually on 2-3 of the switches the pins won’t enter the sockets properly and will bend. This issue is pretty easy to fix, you’ll need to remove all of the problem switches following step 2, and then re-straighten out the pins. We typically like to use a pair of pliers to straighten the pins back out. Once this is done, you can attempt to install the switch again into the keyboard.
Once all of the switches are working properly and are registering in the key tester program, simply put the keycaps back on and you’re good to go! Easy as pie.
Conclusion
Hot-swappable keyboards are awesome and make a great keyboard choice if you plan on trying out several different switch types. Mechanical keyboards with the hot-swappable feature are becoming more and more common every day, especially since soldering requires a lot of equipment and a decent workspace. You can check out are favorite hot-swappable mechanical keyboards here, if you’re interested.
We went over the steps on how to remove and replace switches on a hot-swappable keyboard. There are definitely a few things to look out for such as, 5-pin vs 3-pin, accidently bending pin, and damaging your sockets, but we hope you have an easy time with your project and enjoy your new switches. If you have any other questions about the process, don’t hesitate to ask.
Happy typing and good luck!
