So, you want to lube the stabilizers on your brand-new mechanical keyboard, but all of the guides out there require desoldering the switches first. Luckily, there is a method that requires ZERO soldering. We’ll explain in a step-by-step guide how to lube your stabilizers with no soldering at all.
How to lube your stabilizers without desoldering:
- Remove the keycaps with a keycap puller.
- Cut a thin piece of plastic about ¼” wide. We used a plastic straw.
- Dip the plastic into dielectric grease and insert into bottom of stabilizer.
- Dip plastic into Super Lube and insert into sides of stabilizer.
- Clean up excess lubricant with a cotton swab.
We’ll go over each step more in-depth with images and explain what mistakes to look out for, so make sure to follow along with the guide.
What Are Stabilizers?
If you’re looking up how to lube your stabilizers, you probably already know what they are, in which case you can skip this section. Keyboard stabilizers are installed under each of the larger keys on your keyboard to keep them from shaking and rattling when typing. They are typically mounted to the metal plate of your keyboard but can also be mounted to the PCB. There are a few different mounting methods including clip-in, screw-in, and plate-mounted.
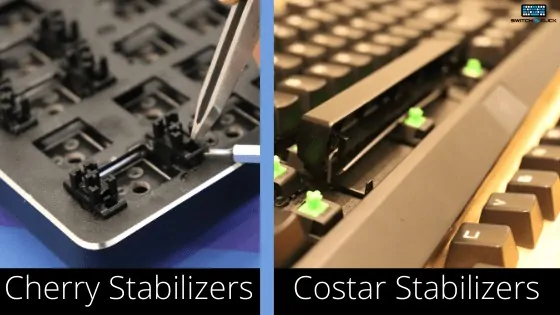
The style of mounting doesn’t matter much for the purpose of this tutorial since we won’t be removing the stabilizers. But if you have the Costar style of stabilizer, the process will be different. This tutorial is geared mainly to people with Cherry style stabilizers, so I would double check really quick to make sure you have the correct type for this method. You can see the difference between the two in the image below.
Why Lube your Stabilizers?
You’re probably thinking, my stabilizers work perfectly fine, why would I need to go through all of this effort to lube them? Well, modding your stabilizers is one of the best upgrades you can make to your keyboard, and there is very little equipment required. All you need are a few simple tools, some cheap lubricant, and a little time to spare for the project.
Modding your stabilizers will reduce the rattling, mushiness, and scratchiness of your current stabilizers, which will lead to improved sound and feel of your keyboard. On a side note, it can be super-difficult describing the changes in words, so I’ll have to rely on some bad-sounding adjectives to get the point across. But in general, modding stabilizers = GOOD.
Upgrading your stabilizers is almost as good of an improvement to your keyboard as lubing your switches. Most keyboards typically slack when it comes to the stabilizer department, I don’t know why, but most manufacturers just don’t put enough love into making sure their stabilizers are stable, smooth, and supportive. Probably because they aren’t the most exciting component, even though they make a huge impact on the entire keyboard experience.
Can you Lube Stabilizers without Desoldering?

Most guides out there will require you to remove the switches so you can get full access to the stabilizers, and to remove the switches you’ll have to take apart the case and desolder the switches from the PCB. With the desoldering method, you’re able to fully remove the stabilizers, lube the switches thoroughly and do other mods as well such as band-aid and clipping. This entire process is pretty lengthy, but it results in some amazing feeling stabilizers.
There is a shortcut if you don’t have all of the soldering equipment on hand or you don’t have the workspace for soldering, this involves lubing the stabilizers while they are still installed in your keyboard. Meaning, you won’t need to remove and desolder the switches or remove the stabilizers from the keyboard. All you need to do is pop the keycaps off and make a small tool to apply lubricant to the stabilizers.
It’s worth noting that lubing your stabilizers without desoldering the switches is not as effective as the full band-aid, lube, and clip mod, but it will improve your stabilizers significantly. You should a reduction in the amount the stabilizers rattle, how scratchy they feel, and they will feel more stable than ever. If you don’t have the soldering equipment on hand, we highly recommend you lube your stabilizers with this method.
If your keyboard is hot-swappable, meaning the switches aren’t soldered to the PCB, you can do the full band-aid, lube, and clip mod without desoldering at all. You can remove the switches from the PCB with a switch puller instead of using soldering equipment. We generally recommend a hot-swappable keyboard for your first keyboard so you can do all of these fun mods without needing to worry about soldering.
Tools Required
- Keycap Puller
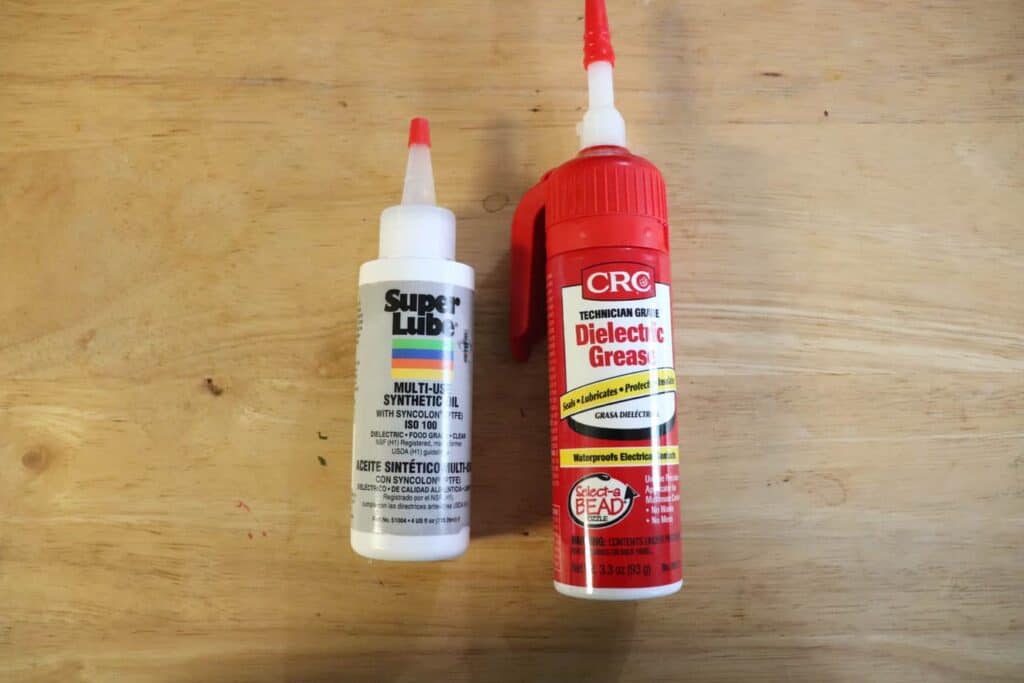
- Dielectric Grease (can find at any hardware store)
- Super Lube
- Scissors
- Tweezers
- Interdental Brush or Plastic Straw/Tape
- Cotton Swabs
In order to lube your stabilizers, you’ll need a few basic tools to get the job done. Most people should have everything on hand already, except for the lubricants. You’ll need two types of lubricant: dielectric grease and synthetic oil. The dielectric grease should be relatively easy to find at a hardware store such as Home Depot or Lowes and any brand should work, no need to be picky. For the synthetic oil, you’ll want something that is high viscosity, we used Super Lube 51004 Synthetic oil and ordered it off of Amazon.
We also recommend getting a keycap puller, the keycaps on the stabilizer keys can be pretty difficult to get off because they are secured by the switch stem and the stabilizers. If you don’t have a keycap puller, you could remove the keycaps by hand, but it can be a difficult and slightly painful. A keycap puller is just a good tool to have ready, in general.
The rest of the equipment is quite common. Any scissors should work, a plastic straw or tape will be needed, and a few cotton swabs for some cleanup at the end. The cotton swabs can be replaced with paper towels if needed.
If you want the best equipment for applying the lube, an interdental brush will work really well, otherwise you can make a tool yourself from a plastic straw or folded up tape.
The Steps
Step 1: Remove the keycaps with a keycap puller.
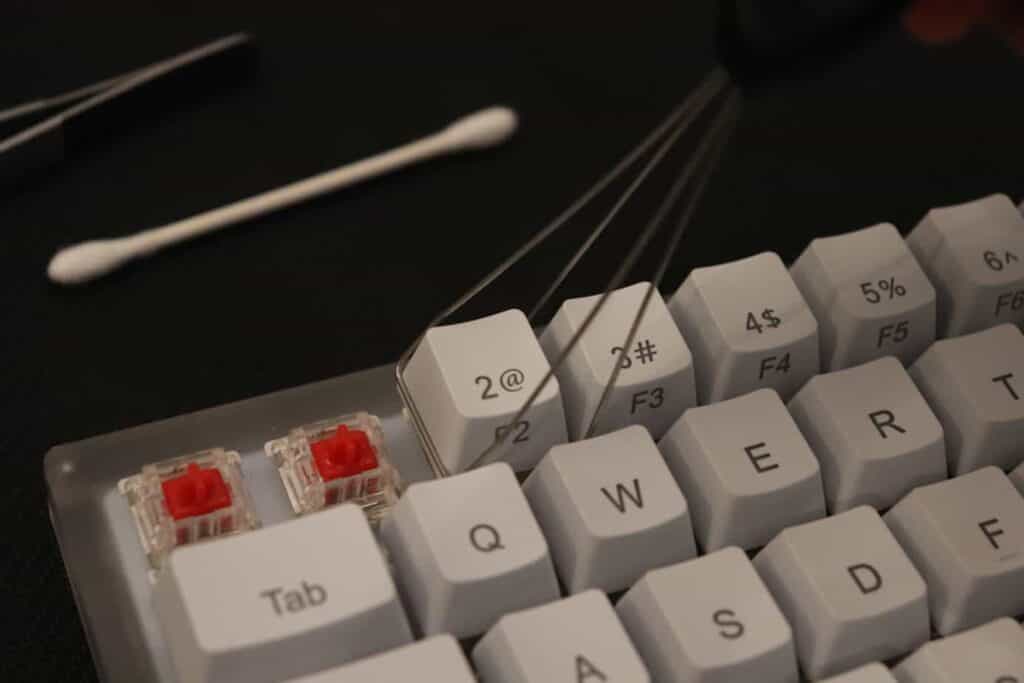
The first step involves taking the keycaps off of your keys. You really only need to remove the keycaps off of the stabilizer keys such as the spacebar, shift, enter, and backspace, but you can remove keys around them as well so you have a little extra room to work.
As mentioned before you don’t really need a keycap puller, but it’s definitely recommended for this project and future keyboard modifications. Using your fingers is a little bit slower and kind of painful.
Step 2: Cut a thin piece of plastic about ¼” wide or use an interdental brush.
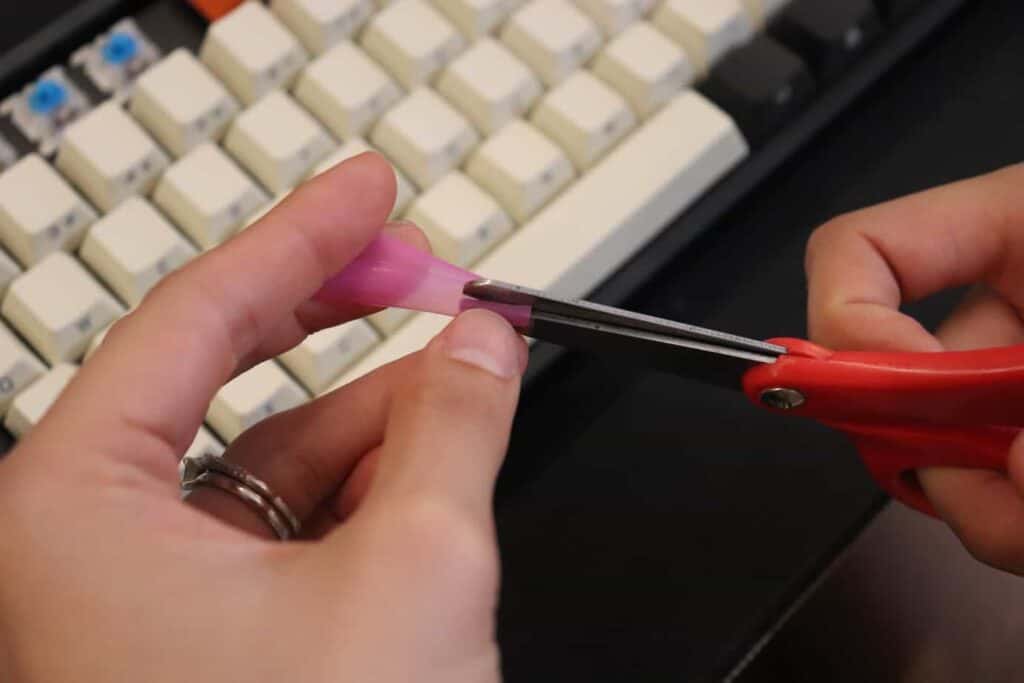
Next you want to prepare your tools. We will be making a small plastic tool to apply lube into the stabilizers, we used a plastic straw cut vertically into a long 1/4″ strip. Another option would be to cut up some packing tape and fold it several times until it’s relatively solid.
If you want a more professional setup, an interdental brush gets the job done perfectly, but you’ll probably have to order those online through Amazon.
You could craft the tool out of other plastic objects as well, we just used what we had on hand. The tool just needs to be thin, narrow, and not too flimsy.
Step 3: Dip plastic into dielectric grease and insert into bottom of stabilizer.
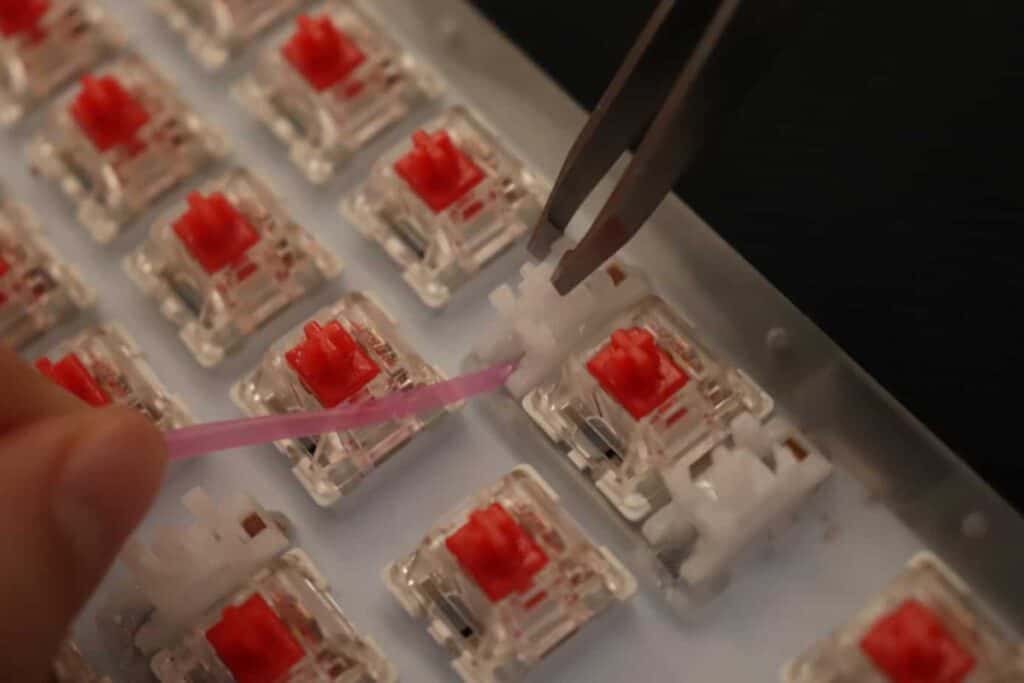
Now for the actual lubing part. You’ll want to take your plastic tool (or interdental brush), apply the dielectric grease to it, and insert the tool into the stabilizer through the bottom section. Be generous with the amount of lube, we typically apply lube twice for each stabilizer.
You’ll want to work through each stabilizer and apply the dielectric grease to the bottom area of the stabilizer. I typically like to pour some of the grease into a small container and then dip our handy plastic tool into it for easy application. It helps to lift up on the stem slightly with a pair of tweezers to be able push the lube underneath the stabilizer better.
Once dielectric grease has been applied to all of the stabilizers, clean of the rest of the lube from your tool to prepare for the next step.
Step 4: Dip plastic into Super Lube and insert into sides of stabilizer.
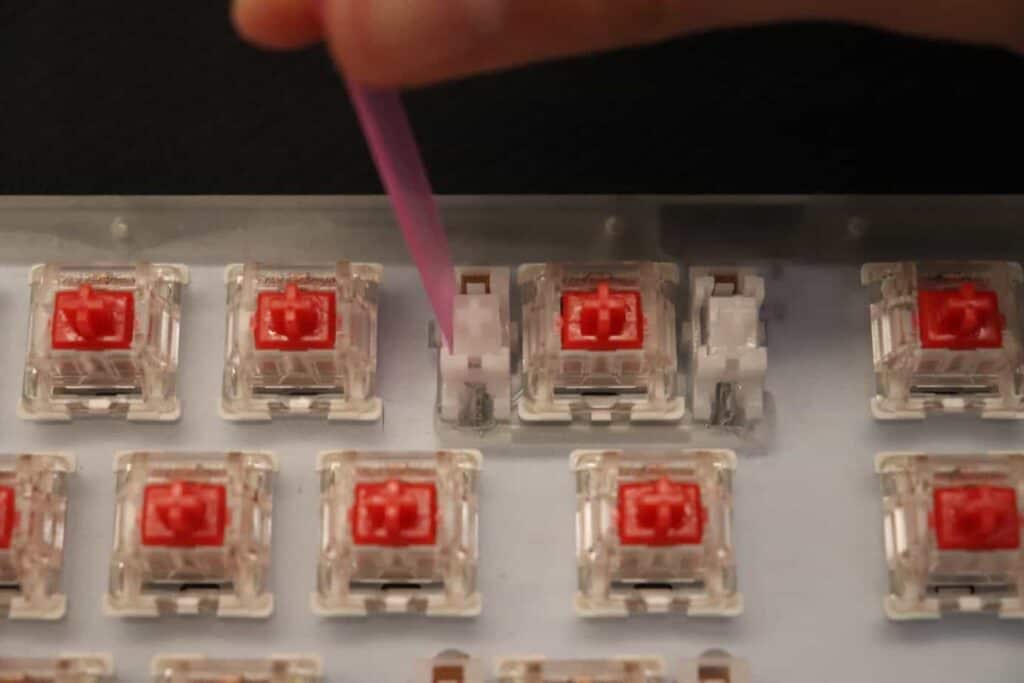
In this step we’re going to be applying Super Lube to the left and right side of each stabilizer. The process is very similar to the last step, except you are using a different type of lubricant and applying the lube to a different area of the stabilizer.
Apply a small amount of Super Lube to your plastic tool and gently work it in-between the stabilizer stem and housing on the left and right side. The purpose of this step is to reduce the friction between both parts when they rub.
You shouldn’t need to apply as much lubricant as the last step, you’ll probably need to the dip the tool one time per each side of the stabilizer. We recommend pouring a small amount of lubricant into a open container so you can dip your tool between application to speed up the process.
Step 5: Clean up excess lubricant with a cotton swab.
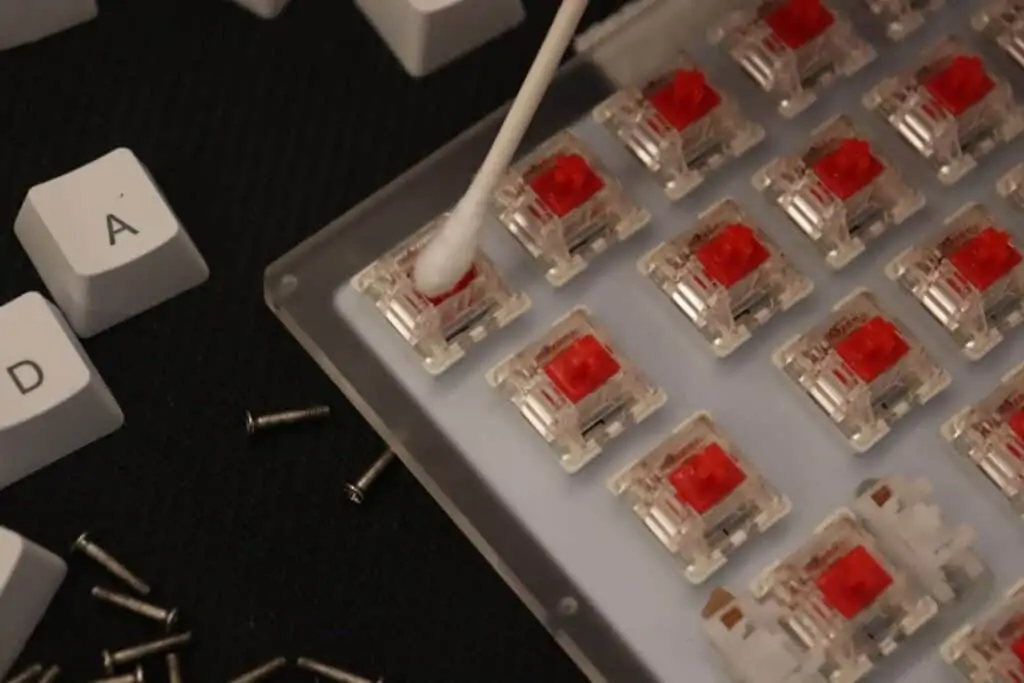
Once all of the stabilizers have been lubricated, all that’s left to do is a little bit of clean up. With cotton swabs or paper towels on hand, you’ll want to wipe up any excess lubricant that made its way outside of the stabilizer. Any lubricant on top of the stabilizer stem or plate will need to be cleaned. If you have trouble cleaning up the lubricant, applying a small amount of isopropyl alcohol can really help cut through the grease.
Once everything is sparkly and clean, simply put the keycaps back on and you should be good to go!
Conclusion
Lubing your stabilizers without desoldering is a big time-saver and can save you from spending money on soldering equipment. Lubing your stabilizers is a big upgrade that we recommend everyone try out. While this method works very well, it will not be as effective as the standard band-aid, clip, and lube mod, so if you do get soldering equipment someday we do recommend going back and doing the full modification.
We walked through the basics of what a stabilizer is, the benefits of lubing your stabilizers, the tools required, and the detailed steps. We listed out the entire modification process in five easy steps to help you in your journey of making the perfect mechanical keyboard.
We hope you lube your stabilizers so you can see for yourself, firsthand, how much of an impact it makes. Happy typing!
