Lubing your switches has become common practice in the mechanical keyboard community, as it adds not only improved smoothness, but also sound.
But what do you do when you have to remove lube? Either from a previous lubing job, or from a factory pre-lubed switch?
Let’s find out the “why” and “how” of un-lubing your switches.
The Tools Required
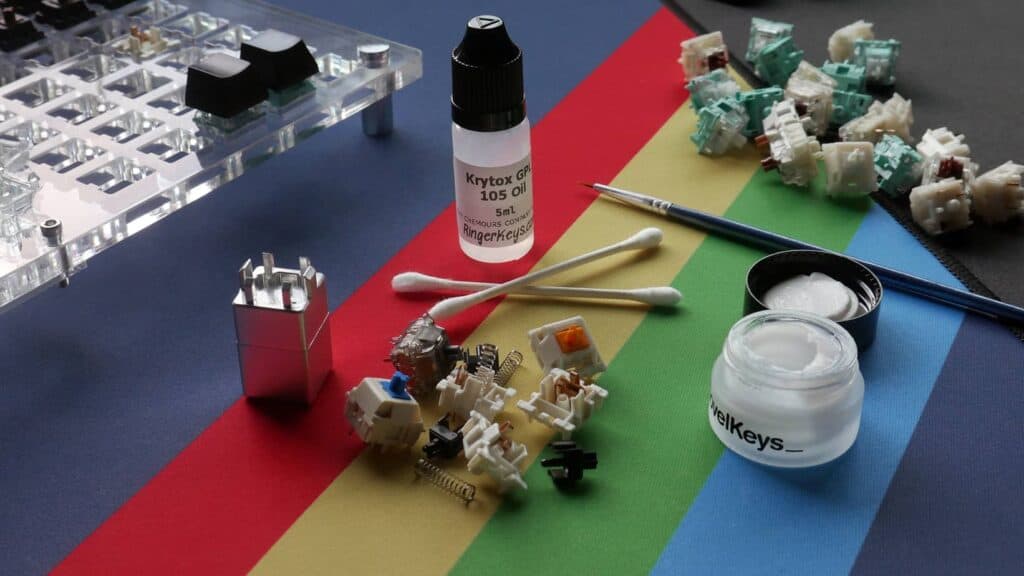
- Switch Opener (Tweezers or Small Flathead Screwdriver will also work)
- Lubing Station (Optional)
- Paper Towels, Microfiber, or Cloth
Method 01: Alcohol Swabs
- Q-Tips
- Isopropyl Alcohol 70% minimum
- Small Plastic Bag or Container
- Salt (Optional)
Method 02: Soap and Water
- Strainer and Bowl
- Soap
- Brush (Old Toothbrush Will Work Fine)
- Hot/Warm Water
Method 03: Ultrasonic Cleaner (for the Clean Freaks)
- Ultrasonic Cleaner (Method 3)
- Distilled Water
- Dishwashing Liquid
Step 00: Take Apart Your Switches
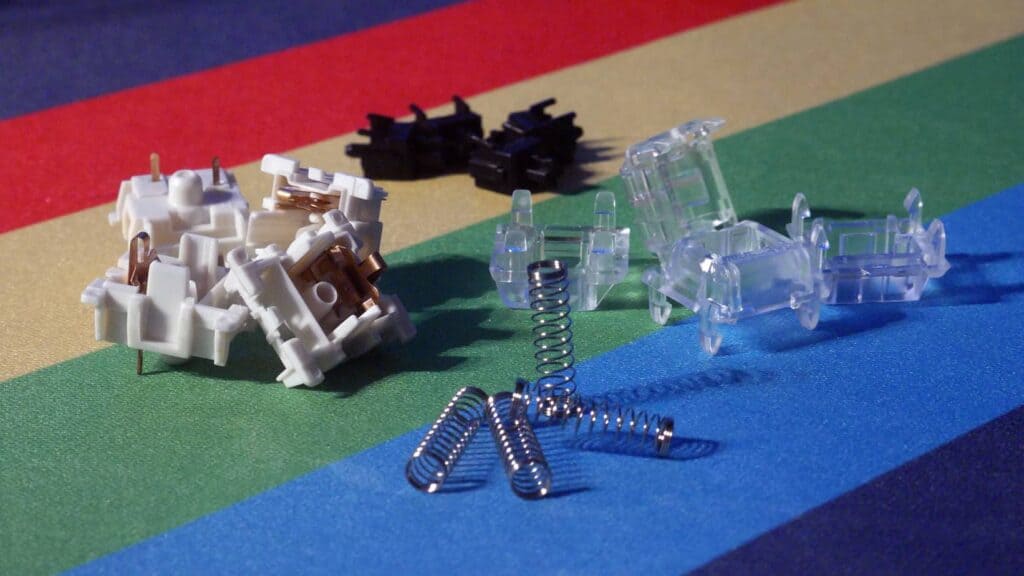
Obviously, you won’t do a very good job of cleaning with your switch still assembled.
In order to remove all of the lube thoroughly and make your switches so fresh and so clean, it is first required that you open them up and disassemble them into their respective parts.
On Cherry-MX style housings, you will find two tabs on either side that will need to be pried apart to open the two halves of the switch housing.
You can pry those tabs apart with a small flathead screwdriver (one by one), a set or tweezers (2 by 2), or with a dedicated switch opener (all 4 at the same time).
Kailh Box and Outemu switches, however, are a but more complicated, as those two tabs are surrounded by a large ring tab.
This ring tab makes it a bit more difficult to open a box housing, but can also be done easily with a dedicated Kailh-style opener.
When you have your housing opened, separate and arrange your pieces.
You should have 4 groups: top housing, bottom housing, stem, and spring.
Method 01 : Alcohol Swabs
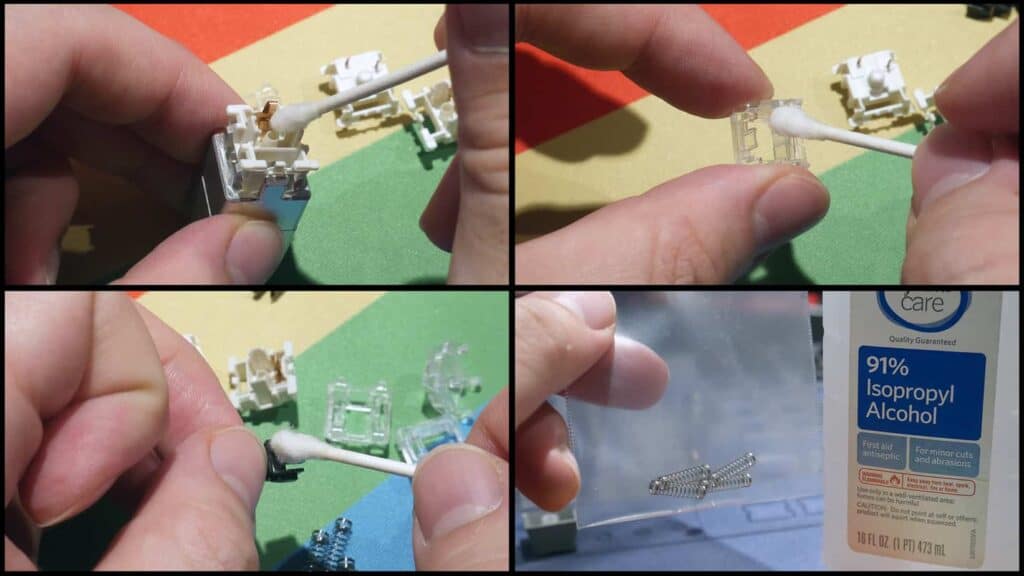
The first method involves using alcohol to strip our switch parts bare of lube.
While some lubricants like Krytox may not be affected much by even strong solvents, it will be much more effective than simply wiping down or washing switches.
You should always be careful of using too much of a strong alcohol and for too long, as alcohol and easily dry out and discolor your plastics.
While alcohol may react differently to different plastics, and thus your different housing components, it is best to practice caution not to have your switches swimming in alcohol for too long.
Step 01 Remove excess lubricant
Even though we are relying on a strong solvent like alcohol, a lot of the heavy lifting can be done by simply wiping away any excess lube with a dry q-tip, microfiber, or paper towel depending on which component.
This will help by allowing the alcohol to simply focus on the surface directly.
Step 02 Dip Q-Tip in Alcohol
Dip your cotton swab into the alcohol and press it against the side of the container to squeeze out excessive liquid.
It may be best to have your alcohol in a small dish or cap, as to not risk contaminating the entire bottle.
The q-tip should be saturated with alcohol, but not dripping wet. Now we will attack each individual switch component.
Step 03 Wipe Away Lube from Bottom Housing
The bottom housing will be the most complicated part, as it consists of not only the plastic housing but a metal leaf as well, usually made of copper.
The leaf can be rather fragile if you aren’t careful, as any deformation to the shape or contacts will leave you with a bad switch.
Simply wipe or scrub the walls, floor, and stem tube with the alcohol-soaked q-tip.
If your q-tip is too large, try removing some of the cotton, or using some paper-towel.
You may have to repeat this step a few times, or alternate with a try cotton swab.
Step 04 Wipe Away Lube From Top Housing
It gets easier as we go down the list.
The top housing is all plastic, and you don’t need to be too cautious or paranoid about breaking any copper parts vital to the switch’s functionality.
Just use your q-tip, dip it in alcohol, and wipe up every surface.
Step 05 Wipe Away Lube From Stem
For the stems, we can now use a paper towel or microfiber instead of a q-tip to wipe away any lube.
Again, you can start with a dry cloth to remove excess, followed by a cloth with alcohol.
You can use a q-tip instead if you wish to be more precise, and around the stem legs as well.
Be careful not to break off any stem legs, or your switch may not function properly.
Step 06 Soak Springs in Alcohol (Reverse Bag Lube)
Many enthusiasts prefer to bag lube their springs for time and ease, so we will be using the same technique to remove lube.
Simply take a container like a small plastic ziplock bag or plastic tupperware bowl with lid, throw in your springs, and cover with alcohol.
You can soak the springs and/or agitate them by shaking the bag or container.
Springs can be factory-lubricated with a PTFE oil, like Superlube PTFE oil rather than thicker oil or grease like Krytox 105 or 205g0.
This method may be more difficult if you have springs lubed with a viscous grease like 205g0.
If your switches have clickbars, you can use any of the above methods to clean them as well.
Step 07 Air Dry
Let all of your switch components air-dry.
Alcohol typically evaporates rather quickly, so this step should not take as long as if water were involved.
10 minutes should be more than enough for even the most soaked switches, but you can let them dry for as long as you see fit.
Optional Step: Alcohol and Salt
If you find that your switch parts still have grease on them, especially the springs, you can add a special ingredient to your bag-unlubing recipe: salt.
Much like a good recipe, sometimes all you need to do is add a little salt.
Salt is a good idea here because it doesn’t dissolve in alcohol, at least not very quickly like it does in water.
You can use this to your advantage by leveraging it as an abrasive element to help scrub your switch parts while they are shaken in alcohol.
Simply add a teaspoon or two of salt (or more) to your bag and shake it up.
To the switch over there with the hella oily layer just add some alcohol and salt and baby shake, shake, shake.
Be careful when doing this to your stems and housings, as the salt could rough up the texture of the plastic.
You may also have to give the springs one final clean rinse to get rid of any salt that might be left over.
Method 02: Soap and Water
If you’re afraid of using alcohol on anything but your springs, you can try using soap and hot or warm water and a brush.
This method should be avoided for bottom housings unless you are extremely careful and let them dry thoroughly
Step 01 Wash your Stems
Using a strainer and a bowl large enough to fit it, place your stems in the strainer, the strainer in the bowl, and fill the bowl halfway to the top with soap and water.
You don’t want to fill the bowl to the very top because this could cause your stems to float away out of the bowl.
Using your hands, agitate the stems in the soapy water. Use the brush to help scrub away the oil.
Make sure you can get some suds and lather going, because this will help ensure removal of any oil or grease still on the surface.
Step 02 Wash your Bottom Housings
Repeat process with bottom housings.
Step 03 Wash Top Housings
This may be risky with top housings, especially with a brush and so much water, so it may be best to avoid washing your bottom housings, and using the alcohol method instead.
Step 04 Wash Springs
Springs get stretched out or tangled if you mess with them too much in a soapy water bath, so it may be best to use the alcohol bag-unlubing method listed above.
Step 04 Dry
Wipe dry as much water as you can from the different parts and allow them to air dry.
If you decided to wash your top housings, the drying process may take longer because of water on the leaf.
You want to make sure these are completely dry before reassembly, so it is best to wait a bit longer to make sure.
Method 03: Ultrasonic Cleaner (aka Overkill)
This method might sound a bit impractical, but if you have access to a small ultrasonic cleaning machine, it could also be the most effective and hassle-free of all the methods.
Ultrasonic cleaners use sonic waves to pulse and clean any item submerged in its tank, so it may be super effective for you too.
Step 01 Fill Container with Water and Dishwashing Liquid
Usually Ultrasonic cleaners require a ph-balanced solution to clean your items, so distilled water is a common choice. Some may even suggest a bit of dishwashing liquid added to help with surface tension and oils, which would be good to use in this case.
Step 02 Submerge Housing Parts
Ultrasonic cleaners typically include a plastic or metal basket to contain the items being cleaned. Your stems and springs may be too small and might fall through these holes, so you may need to use a small mesh bag or wire mesh to help contain them.
Step 03 Run Cleaner
Run the cleaner according to instructions. There may be multiple preset timed options to choose from.
Step 04 Dry
Now that your switches are cleaner than new, it is time to dry them out.
Final Step : Reassemble Switches
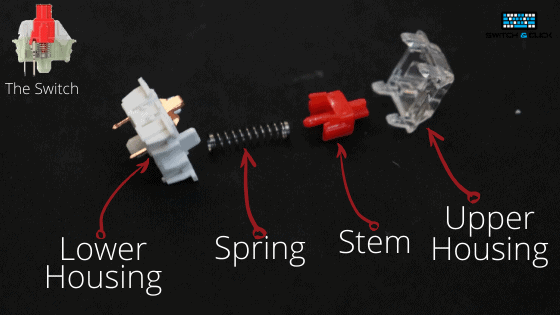
After your switches have done drying, they need to be reassembled before use.
Make sure when reassembling that the stem legs face the copper leaf, and the top housing is in the correct orientation before snapping the switch back together.
If your components are facing the wrong direction upon reassembly, you could risk damaging or breaking your switch.
Why Removing Lubricant Can Be A Good Idea
There a few reasons why unlubing your switches would be a good idea.
The switches you ordered were pre-lubed from the factory, with an unconfirmed lubricant or one that you don’t prefer, and you wish to remove the lube to apply your own.
You wish to relube the switch with a different product altogether, or simply want to start from scratch due to a poor lube job.
You want a dry switch or stem because the lubricant that was applied before spread to the stem legs and leaf of a tactile switch, affecting tactility.
Do I Need To Be That Thorough?
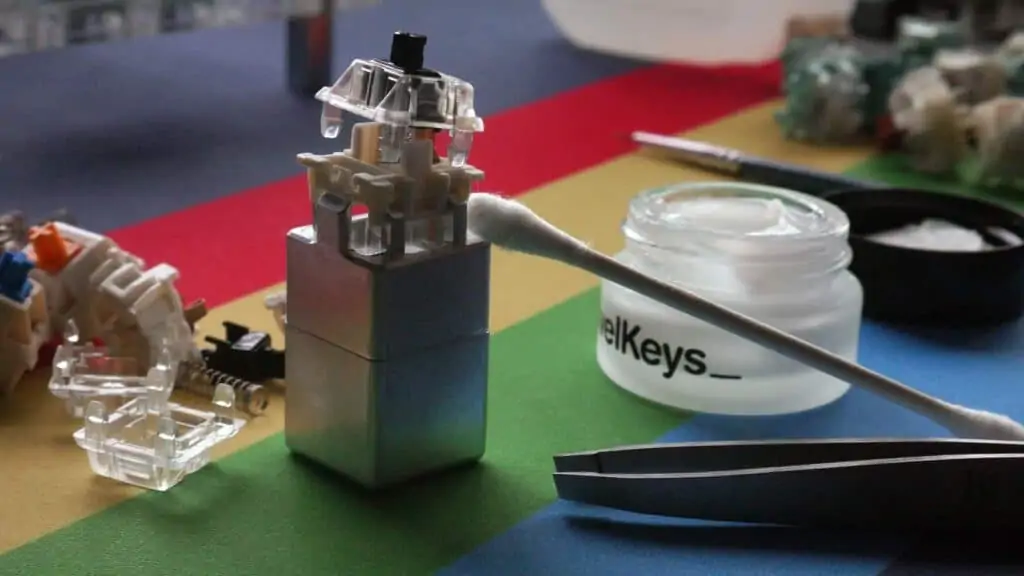
If you plan on stripping your switches only to relube with the same grease or oil, then you don’t have to remove everything.
A simple wipe will do so that you have a cleaner base to start from.
If you intend on using a different lube altogether, it is recommended to strip as much of the old lube off of the switches as possible.
It is most important to be aware of lube on the stem legs or leaf of a tactile switch, as this could reduce the overall tactile feel.
Mistakes to Avoid When Removing Lubricant
Don’t overdo it. Some lubricants, like thicker Krytox 105g0, 205g0, and 205g2, are simply too inert for some methods to work very well at all.
Do Not Remove the copper leaf, unless you want to have a bad time.
Don’t soak your switches for too long in alcohol, or else discoloration may occur. This happens with the alcohol removes any clear coat from the plastic and dries it out.
Conclusion
Lube is a blessing, but it can also be a curse if you aren’t careful.
If you find yourself in a situation in which you need to remove the lube from your switches, we hope this guide helps give you some ideas on what is required.
Interested in putting lube back on your switches? Check out our helpful guide to switch lubing.
