From time to time I can let my keyboard get a little bit dirtier than it should be. In order to keep my keyboard consistently clean, I did some research about the perfect cleaning schedule to figure out exactly how often a keyboard needs to be cleaned.
So, how often should you clean your keyboard? Ideally, you want to clean the surface of your keyboard quite often. Once a week, wipe the keyboard down with a disinfectant wipe. A deeper clean is recommended every 4-6 weeks to clean everything that falls between the keycaps.
We’ll go over some interesting statistics on how often people clean their keyboards, and how many already do the recommended amount of cleaning.
How Often does the Average Person Clean their Keyboard?
In order to get some more data (and make this topic a little more interesting), we asked our YouTube audience how often they clean their keyboards. The results were a little shocking… and not in a good way.

As you can see, the results aren’t that great, although quite entertaining. Around 31% of people almost never clean their keyboards, while an additional 8% would rather buy a whole new keyboard than clean their existing one.
If you do the math, only about a third of the people we surveyed follow the ideal cleaning recommendations of a deep clean once a month. Everybody else would rather clean their keyboard once a year or only if it’s really necessary.
Keep in mind, the people in our community are mechanical keyboard enthusiasts who spend way more on their keyboards than the normal person. For a lot of people their keyboards are basically their baby. I don’t even want to imagine what the results would be if we asked totally random people.
Not the best results, but I’m not sure what we were expecting. Still, pretty interesting to see what other people are doing.
Why Clean your Keyboard?

There are a multitude of reasons to clean your keyboard and they are all common-sense, to be honest. Cleaning your keyboard will clean off all of the germs that might accumulate and lower your chances of getting sick.
In addition, your keycaps won’t accumulate too much grease or stickiness which can help improve your typing experience. Let’s face it, nobody likes typing on a super dirty keyboard.
Another added benefit is that a clean keyboard has a less chance of breaking. You will have less crumbs that may enter the cracks of your keyboard or accumulate inside one of the switches. Nobody wants to spend time desoldering a switch, taking it apart, and attempting to clean out whatever gunk has built up on the inside.
All-in-all, a clean keyboard is much better than a dirty one. Plus, you don’t want to be the target of social ridicule by coworkers or family members just because your keyboard is a little bit dirty (flashbacks to my childhood).
The Keyboard Cleaning Routine

- Once a week: Wipe down keyboard keys with disinfectant
- Every 4-6 weeks: Clean keyboard more deeply by removing keycaps and cleaning between keys.
The Weekly Clean
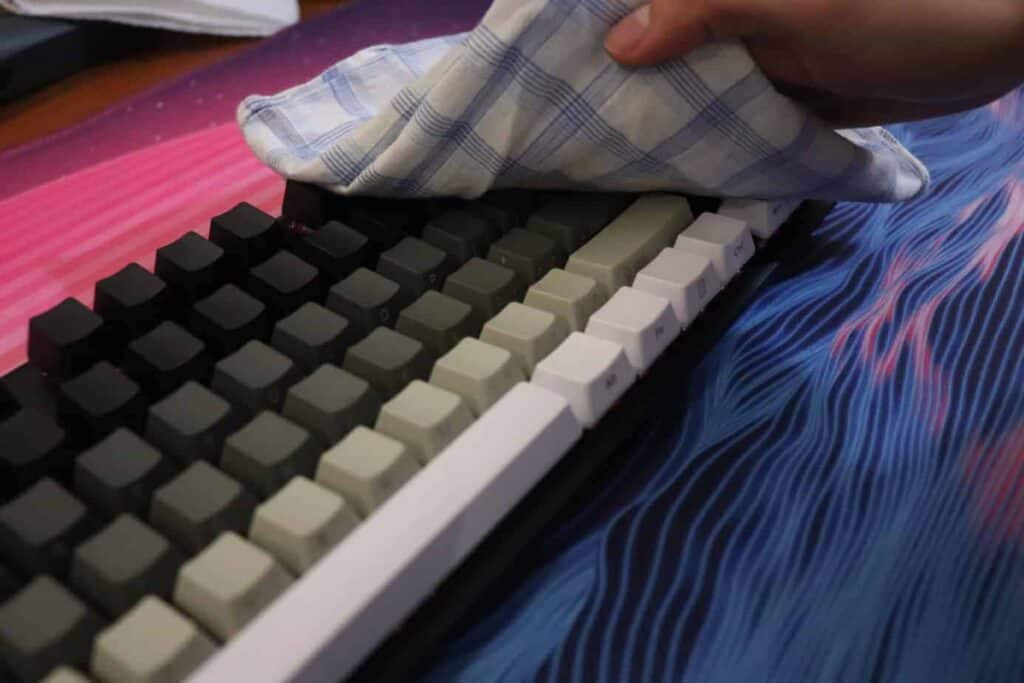
Ideally, you should be wiping down the surface of your keyboard with a disinfectant wipe quite often, we recommend once a week. If you work on a shared keyboard, it’s best to wipe down the keyboard between each usage to keep from transmitting germs and other fun stuff.
We typically recommend a microfiber towel that’s been sprayed a few times with disinfectant to wipe down the keyboard. Avoid using paper towels as they will have small pieces get left behind that will stick to your keyboard. If you don’t have a microfiber towel, an old t-shirt or handkerchief should work well.
The once a week clean can be done in less than a minute, and the main purpose of this clean is to remove anything that you would directly touch on a day-to-day basis. Stuff like grease, food, germs, etc resting on the keycaps should get wiped up.
This clean is very important, especially considering the times. Definitely disinfect your keyboard more often if more than person uses it.
The Monthly Clean
The monthly, or 4-6 week clean, is focused around doing a deeper clean of your keyboard. Any hair particles, crumbs, or dust bunnies that fall between your keycaps will get cleaned. To get everything prepared, unplug your keyboard and gather your cleaning supplies.
Remove the Keycaps
For this clean you’ll need to remove the keycaps first. We recommend using a keycap puller to remove the keys quicker, just be careful not to pull the keycaps off too fast, as you want to gently wiggle them off so you don’t accidentally damage the stem on the switch underneath.
Soak the Keycaps in Soap and Water
Once the keycaps are off, you can do a deeper clean of the keycaps by soaking the keycaps in soap and water and then letting them dry on a few paper towels overnight. This will remove any sticky or oil buildup on the keycaps and make them feel as good as new.
I put the keycaps in a bowl with a warm water and a few drops of soap, then I move the keycaps around with my hand and scrub off any visible stains or dirt. Then let the keycaps soak for about thirty minutes before straining the keycaps and letting them dry spread out on a few paper towels.
Clean Between the Switches
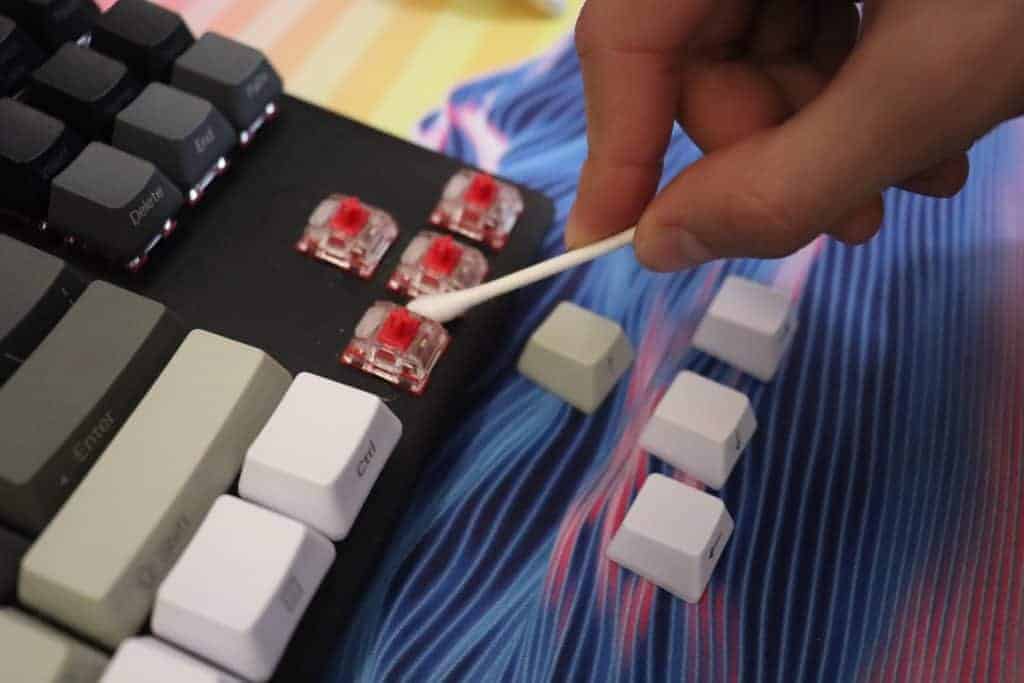
With the keycaps still off of your keyboard, you should now be able to clean the surface of the keyboard better. Take a cotton swab and work your way between switch, cleaning up any dust or crumbs that have accumulated. You could also use a vacuum or compressed air if you want to clean everything a bit faster.
Finishing Up
Once everything is all sparkly clean and the keycaps are dry, you can reinstall them back on your keyboard. Overall this whole process should take about 20-30 minutes of work, but you’ll have to wait while the keycaps dry out.
The Keyboard Design Matters
It’s important to note that the frequency of cleaning can change depending on the type of keyboard you have. For example, a keyboard with the floating keycap design will need to be cleaned more often because it’s easy for hair and crumbs to fall between the keys on your keyboard.
A keyboard with a higher-profile design won’t need to be cleaned quite as often because there is less room for dirt to fall between the cracks. But definitely use your own judgement when optimizing your keyboard cleaning schedule.
Conclusion
Coming up with the ideal cleaning schedule is not the most exciting thing in the world, but it can lead to better hygiene and a cleaner lifestyle. Not to mention, you’ll have less people judge you the next time see your keyboard. Instead of a grease-coated keys, yours will be shiny and looking brand-new.
We definitely recommend you implement a weekly and monthly clean with the weekly clean focused more around wiping off the surface of your keyboard and the monthly clean focused around doing a deeper clean to get everything that falls between the cracks.
Stay clean and happy typing!
