When buying switches for your mechanical keyboard, there are two types of mounting sytles: PCB-mounted and plate-mounted. Figuring out the differences can be confusing, so we’ll explain what they both mean.
PCB-mounted switches have 5 pins, while plate-mounted switches have 3 pins. You can modify a PCB-mount switch to fit a plate-mount by clipping the extra pins on the bottom of the switch.
We’ll dig into all of the differences between these switch types and tell you how to modify the switches fit your board.
Difference Between Plate-Mounted and PCB-Mounted Switches
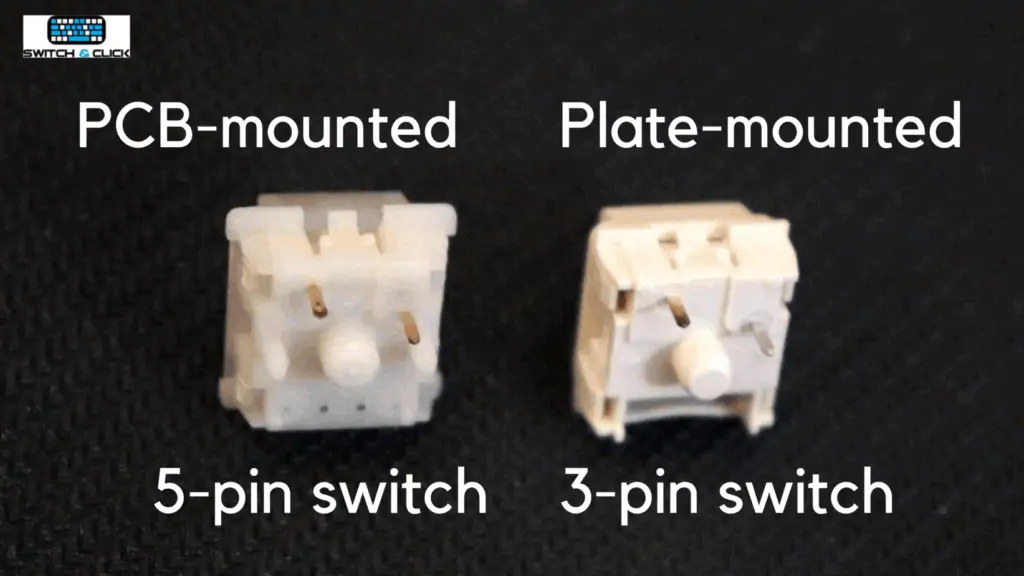
To look at the main difference between a PCB-mounted and plate-mounted switch, look at the number of pins on the bottom. A PCB-mounted switch will have 5 pins, while a plate-mounted switch will have 3.
What is a PCB-Mounted Switch?
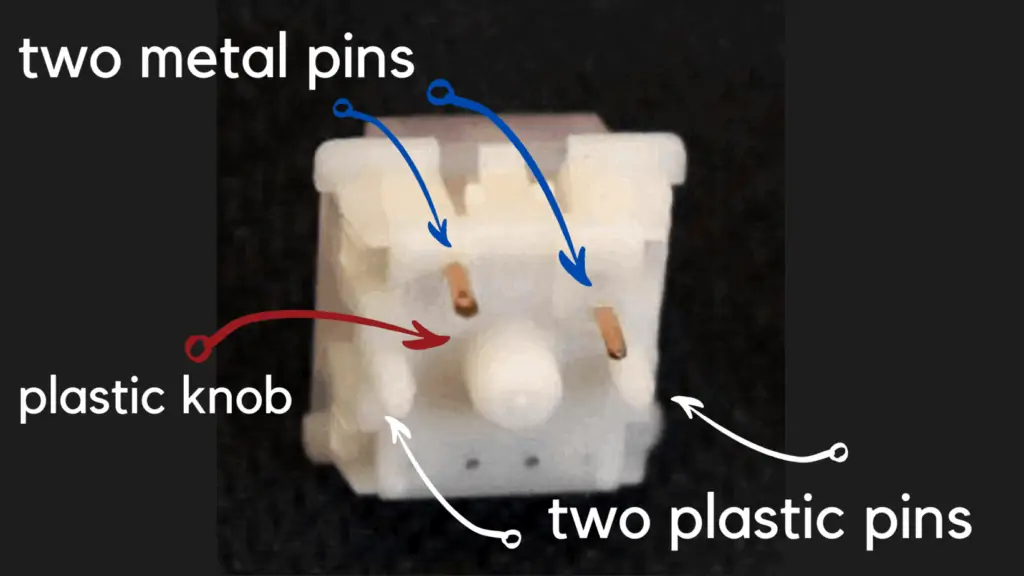
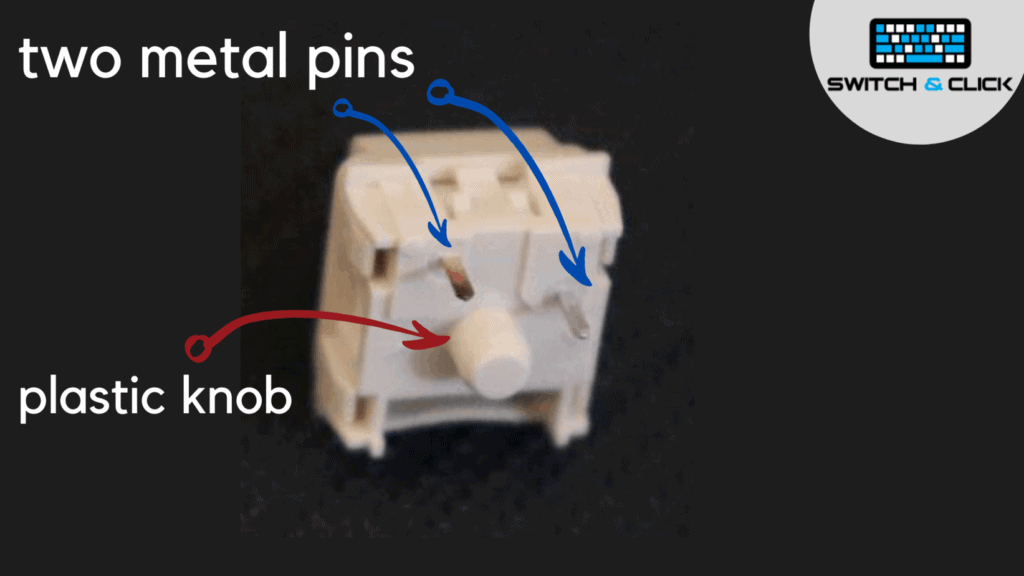
PCB-mounted switches are 5-pin switches because when you look at the bottom of them, there are 5 pieces total.
There are two metal pins that allow the switch to work, two plastic pins on the sides that provide stability, and a middle “pin” that looks more like a large circular knob.
The switches can be soldered and mounted directly to the PCB, making for a relatively simple installation (as shown below).
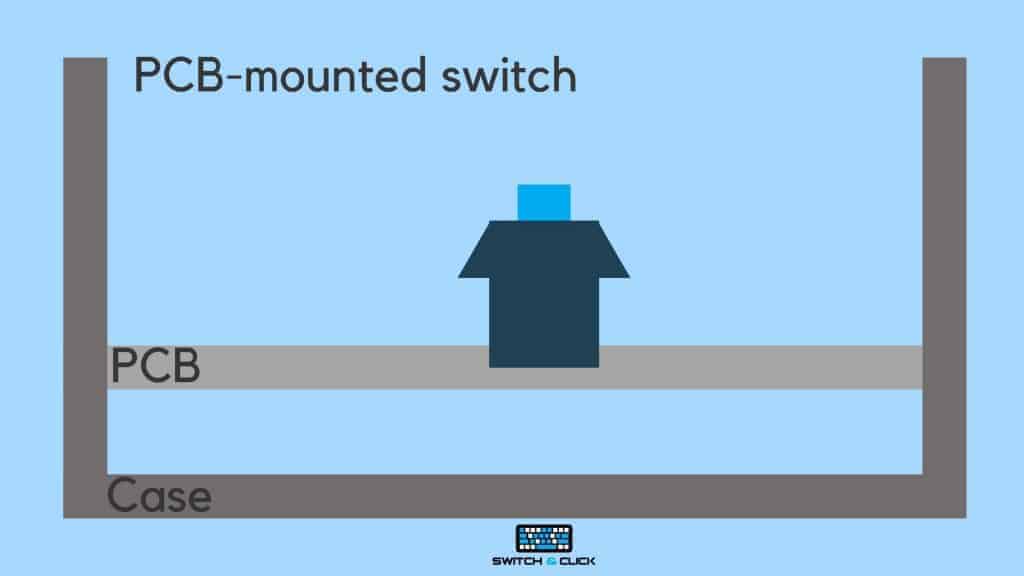
The switches also come with guiding pins to help install the switch to the PCB. In general, this type of installation has a lighter feel, and the keys will tend to bounce a bit more. The PCB mounting style is generally used with smaller keyboards as they tend to flex less and need less structure to hold together.
However, in modern boards, having a plate is very common. It is possible to choose to build a keyboard without a plate, but the stability of the switches is determined by the soldering quality.
What is a Plate-Mounted Switch?
Plate-mounted switches are called so because they require a plate. These switches only have 3-pins on the bottom: the two metal pins and the middle circular knob. They lack the stabilization pins.
That’s where the plate comes in. The plate will stabilize each switch and reduce side-to-side wobbling whenever the key is pressed (as shown below).
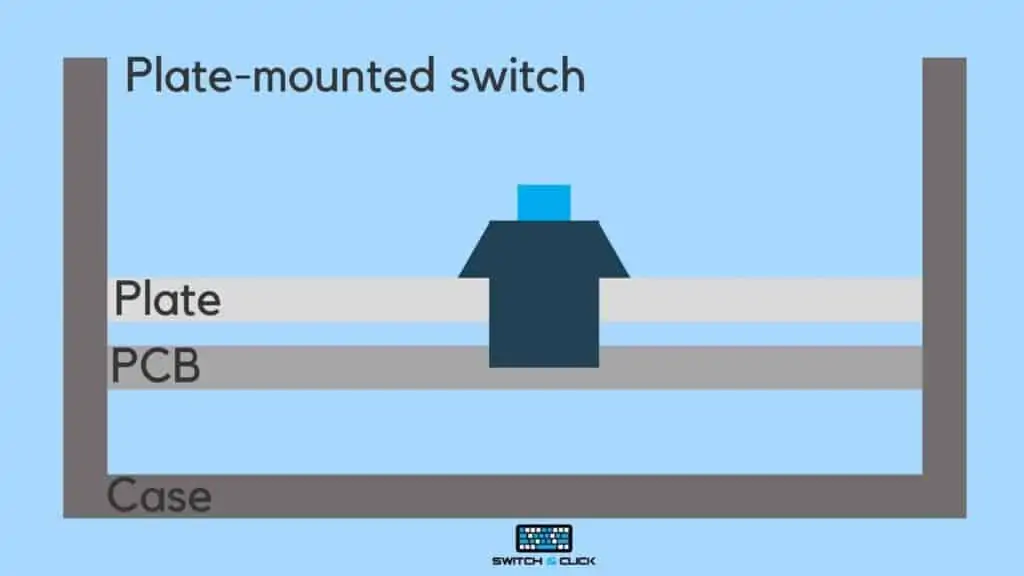
Plate-Mounting VS PCB-Mounting
Plate-mounting involves installing the switches to a metal plate that is above the PCB. The switches are then soldered to the PCB after being placed in the metal plate. The plate allows the keyboard to feel more reinforced and stable with a heavier feel.
These plates are often used with larger keyboards to provide more support because due to the extra size, the keyboard tends to flex more. The plate also adds more rigidity to the keyboard and helps keep everything better secured.

The switches have one major difference from the PCB mounted style, they do not need the additional guiding pins because they are installed into the plate instead of directly to the PCB.
Just keep in mind, once you solder the switches, the plate will be very difficult to remove.
You will need to remove the switches to take off the plate and re-solder each switch back to the PCB again. If you plan on making lots of modifications and changes, this might not be the right style for you.
Overall, the plate-mounted keyboards are higher quality and tend to last longer.
Some people enjoy the finger-feel of this style of mounting because it makes the keys more stable and less rocky. Just keep in mind this configuration is typically more expensive due to the extra components and assembly.
5-Pin vs 3-Pin Switches
Let’s a take a closer look at 3-pin and 5-pin switches. One switch type is not necessarily better than the other. However, if you mount switches without a plate, then there is less support for your switches.
Due to the lack of reinforcement, the keyboard will feel more rickety and less stable. If you are a heavy-handed typist or you enjoy of feel of a very stable keyboard, you may want to add a plate into your build.
But overall, the PCB-mounted style of keyboards is cheaper to build because it does not require the additional reinforcement plate and some might find it easier to build.
In many hot-swappable boards, they support primarily 3-pin switches. Having 3-pin switches may be beneficial in this regard.
If you are building a custom keyboard, this is less of a worry because you can pick and choose what PCB you end up using.
Even if you buy 5-pin switches but want to put them in a 3-pin board, it is easy to make them fit.
Convert 5-pin Switches 3-Pin
As we’ve stated before, the only difference between 5-pin and 3-pin is the number of legs sticking out.
By using either nail clippers, flesh cutters, cuticle cutters, or other common tools you may have around the house, you can clip off the two plastic side legs.
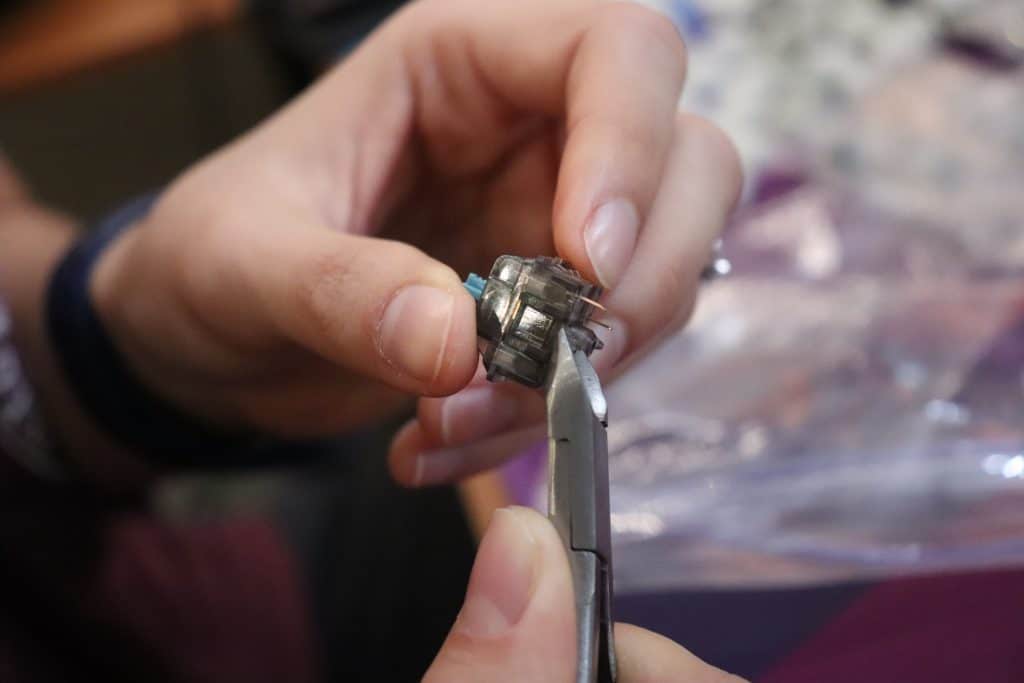
Be sure not to clip the metal pins off, as those are necessary for the switch to work and send signals to your computer.
What is a PCB?
Let’s clarify some of the differences really quick. The PCB is the foundation of your keyboard, everything starts here and is built off this part. Like a motherboard on a computer, the operations of the keyboard start at the PCB. The switches are soldered onto the PCB and send the electrical impulses when the keys are pressed.
Different Kinds of PCBs
There a few different styles of PCBs and they all have their own benefits and features. We’ll go over them briefly to give you a better understanding of how they work.
Soldered PCB
This is usually the default option when buying a custom mechanical keyboard. If the description says nothing, it is most likely to be a solderable PCB.
A soldered PCB means that you need to solder in your switches while building your mechanical keyboard. They most likely have 5-pin sockets to allow PCB-mounted switches.
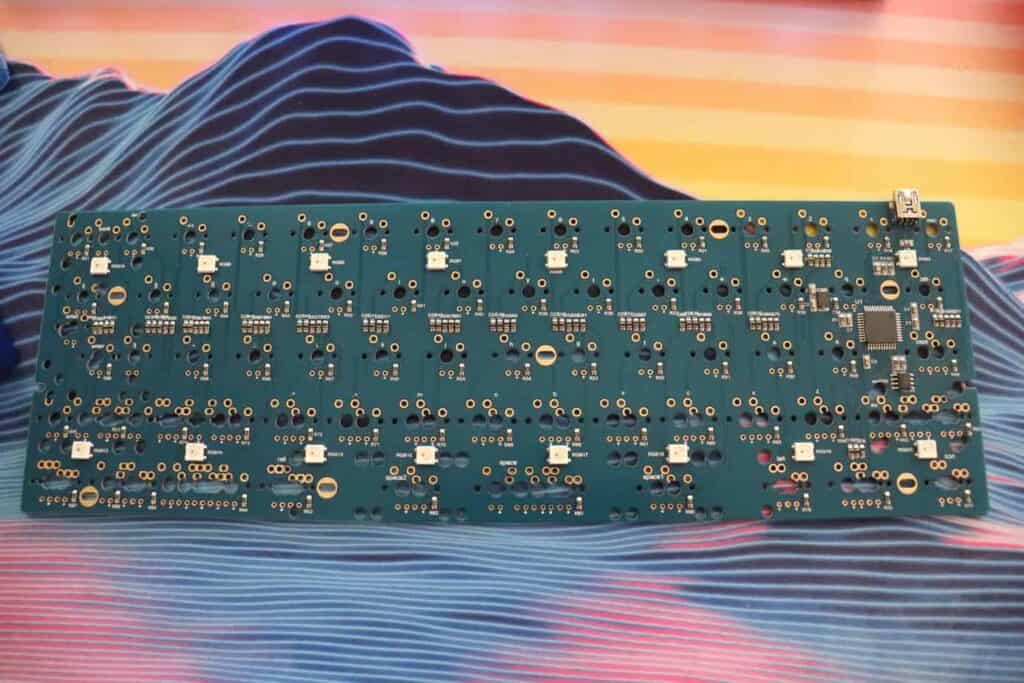
If in doubt, there will be a picture of the plate itself. The picture below shows a solder PCB that supports 5-pin switches.
The large knob of each switch goes into the large hold. The two plastic pins go on either side. And the metal pins go on top. The two small holes underneath are for LEDs if you choose to solder them.
Hot-swappable PCB
A hot-swappable PCB comes pre-installed with hot-swap sockets. These can come from various brands such as Gateron, Kailh, and Outemu.
They enable you to install switches without soldering or desoldering them.
It is a great option for beginners who are new to the mechanical keyboard world and do not want to invest in soldering equipment. They are beneficial because they allow you to experiment with different switches.
The above picture shows the hot-swap sockets. One downside of hot-swap sockets is that they can be damaged through excessive force when swapping out switches.
This means that you’ll have to solder them back onto the PCB to get them to work again.
Through our experience of hot-swapping many times, we have yet to damage our PCB or pull out the sockets.
Hot-swap PCBs can either support 5-pin or 3-pin switches. However, they are always plate-mounted because the sockets do not stabilizer the switches enough without the plate or soldering to hold them in place.
Through-Hole PCB
A through-hole PCB is a form of solderable PCB that requires more work on your end.
You have to solder in diodes, resistors, the USB connector, and more. These builds are typically geared towards more advanced keyboard builders with experience soldering. It can also be a fun project as well.
These builds are typically 5-pin PCBs, and the plate is optional, although can usually be purchased along with the PCB in a kit.
Through hole keyboards also come with in-depth build guides, so even if you are new and want to try it out, you can do so. There are many videos that you can watch and follow along as well.
What is a Plate?
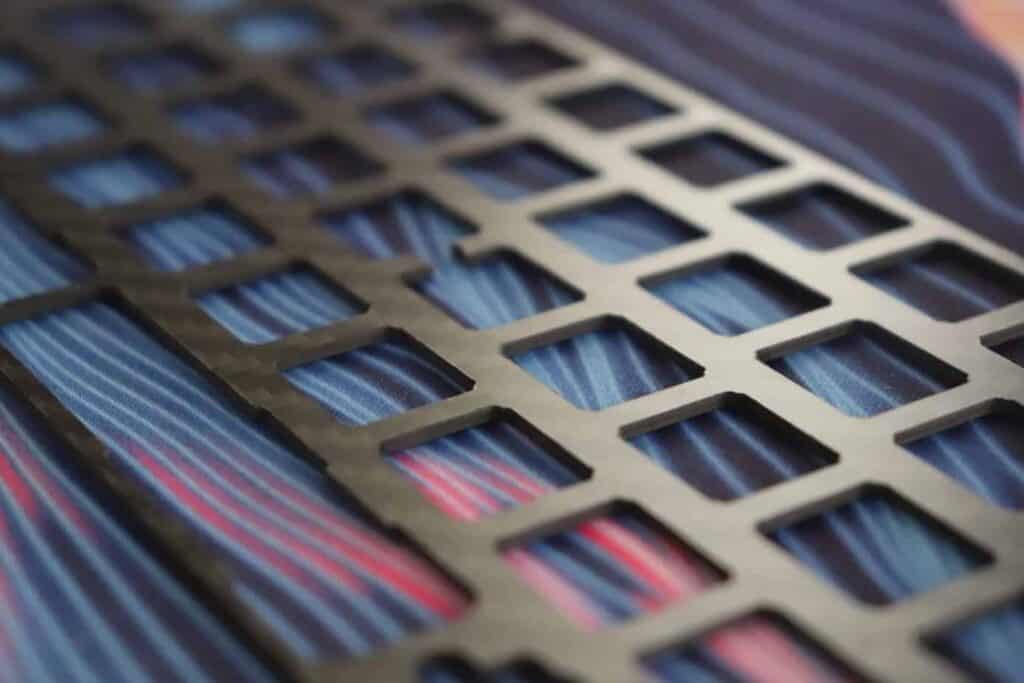
The plate mount is added on top of the PCB for extra support, this helps prevent the keyboard from flexing and provides some extra stability. Not every keyboard has this part. This is what the main difference between the two types of switch mounted configurations, whether or not they have this plate.
Different Plate Materials
The following list is all of the common materials. It is not an encompassing list because there are always new materials being tested as plates.
Many custom mechanical keyboards, after they are sold, put up the plate files online. This is for people who want to CNC or print their own plates to use on their keyboard.
The two most common materials for plates are aluminum and brass. Beyond this, it is up to the customer to source materials and build their plate.
Although there are different plate materials, trying them out and seeing what works for you is the best way to go.
The different switches and case materials will also affect the overall sound and feel of the keyboard.
Aluminum
Aluminum plates are the most common and seen on prebuilt keyboards as well as custom.
It is widely available and easy to cut. Aluminum provides a sturdy plate that has no flex in the keyboard. It is a moderately rigid material.
Brass
Brass is more rigid than aluminum. Over time, without being treated, brass will oxidize and tarnish over time.
Some users have noticed that brass is bassy and loud. However, others have noticed minimal difference between brass and aluminum.
Polycarbonate
Polycarbonate is a plastic material. However, it also has a bassy sound. Polycarbonate plates allow flex and feels bouncy throughout the PCB.
Carbon Fiber
Carbon fiber is lightweight very also durable. It allows flex when typing/gaming, which provides a bouncy feel.
For a video comparison, see this video here. It compares different materials of plates on the same keyboard to eliminate external variables such as different case material, different switches, different environment, different keycaps, etc.
Conclusion
We went over all of the differences between plate-mounted and PCB-mounted switches in this guide. They differ mainly by the number of pins on the bottom of the switch, whether they are 5-pin or 3-pin.
The number of pins do not make too much of a difference, however, because you can simply clip off the extra plastic pins if your PCB only supports the 3-pin mounting style.
We also explained the benefits of building a keyboard with a plate vs a PCB mounting system such as differences in feel, quality, and rigidness.
There are several different PCB types out there that all offer a unique typing experience and features, which really show the depth of this fascinating hobby.
Hope this helps, happy typing!
