
There are a ton of different stabilizers types, styles, sizes, and mods out there, so it can be difficult navigating the world of stabilizers. We’ll go over everything you need to know and give you all the juicy details.
Make sure to check out our in-depth guide on how to build a keyboard.
What is a Stabilizer?
Stabilizers are a essential keyboard component placed under the larger keys such as space bar, backspace, and shift, to keep the keys from shaking, rattling, and tilting while typing. The stabilizers keep the keys balanced so you can have a stable typing and gaming experience.
The Different Stabilizers Types
There are a few different stabilizer types out there, Cherry style, Costar, and Optical. They are each significantly different, so we’ll explain what makes them unique.
Cherry Style Stabilizers

Cherry style stabilizers are the most common stabilizers out there. They are the preferred stabilizer type as they are easy to mod and have a lot of different options when it comes to mounting styles, colors, and material types.
Cherry stabilizers have the shape of a Cherry MX switch stem, hence the name Cherry style stabilizers. They make adding and removing keycaps a breeze.
In this guide, we’ll be focusing primarily on the Cherry stabilizer type when explaining all of the different options available. It’s possible to get Cherry style stabilizers in screw-in, snap-in, or plate-mounted variations.
We highly recommend getting a keyboard with Cherry stabilizers as they are the most versatile stabilizers out there.
Costar Stabilizers

Costar stabilizers are a less common stabilizer type, as they are primarily only found on older keyboards, although some newer keyboards may have them.
Costar stabilizers are quite difficult to use and have to be hooked into the keycap to fit. Getting the stabilizer bar to insert properly into the keycap can be a frustrating and lengthy process.
If you like to remove your keycaps and clean your keyboard regularly, these stabilizers can be quite the headache.
They are also difficult to mod and makes replacing the keycaps on your keyboard quite difficult.
Costar stabilizers are great if you want to install them and forget about em. No modding required, pretty good performance, and are affordable to replace. However, not the best if you enjoy tinkering with your keyboard and swapping out your keycaps regularly.
We talk about installing a spacebar with Costar stabilizers here.
Optical Stabilizers
Optical stabilizers are typically only found on keyboards with optical switches, and have a funky design (such as the Razer Huntsman Mini). They have small clips that insert into the keycap that you snap into the stabilizer bar under the plate of the keyboard.
There isn’t a good way to modify these stabilizers to improve them, although you could apply a small amount of lubricant to reduce the sound and rattle noises.
From our experience, these stabilizers are quite rattily, but if you use optical switches, you’re pretty much stuck with them. Not much else to say about these stabilizers.
Stabilizer Size Guide

There are three stabilizer sizes you can purchase: 7u, 6.25u, and 2u.
The stabilizers follow the same measuring system as keycaps, where 1u = the width of one keycap.
The 6.25u size is what you’ll need for a standard spacebar, unless you have a non-standard keyboard layout, in which case you’ll need the 7u size. For the most part you can ignore the 7u size, unless you have a custom keyboard.
All of the other larger keys on your keyboard (that aren’t the spacebar) will require a 2u stabilizer.
If you have a full-sized keyboard, you’ll need:
- 6.25u stabilizer x1
- 2u stabilizer x7
If you have a tenkeyless keyboard, you’ll need:
- 6.25u stabilizer x1
- 2u stabilizer x4
For the smaller layouts, the stabilizers required can vary based on the layout of the keyboard, so there is no exact amount.
A Closer Look at Cherry Style Stabilizers
Now that we’ve gone over the three main stabilizer types, let’s take a closer look at the Cherry style stabilizers as they are the most common and the go-to stabilizer if you’re building a keyboard.
Cherry stabilizers are made up of three main components, the stabilizer bar, insert, and housing. These three components work together to keep the larger keys stable and reduce rattle.
Each key will have one stabilizer bar, two inserts, and two housings. The stabilizer bar keeps both sides of the key from tilting when typing. The stabilizer bars come in several different sizes based on which key it is for, but we’ll get into that later.

Different Mounting Styles for Cherry Stabilizers
There are three different mounting styles for Cherry style stabilizers, they can attach differently and are compatible on certain keyboards. Plate-mounted stabilizers attach to the metal plate, while the other two attaches to the PCB (printed circuit board).
Shown below is a side view of a keyboard with a metal plate and PCB. Read more about PCB vs plate-mount.

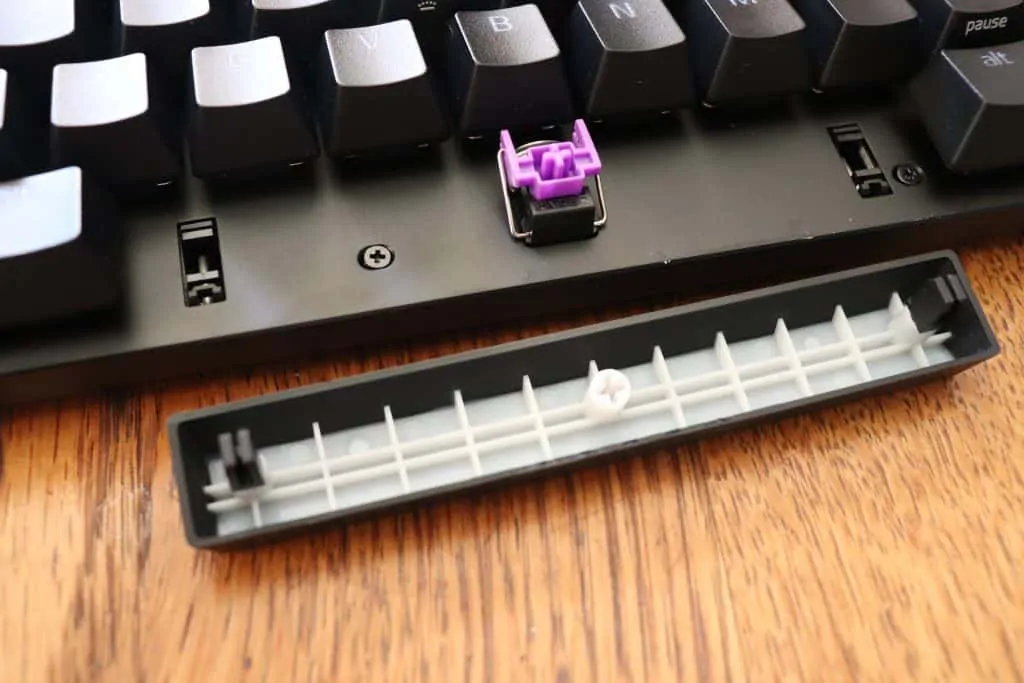
Plate-Mounted Stabilizers
Plate-mounted stabilizers are the most common mounting style and are typically found on almost all pre-built mechanical keyboards. These stabilizers attach to the metal plate inside the keyboard instead of directly to the printed circuit board (PCB).
Plate-mounted stabilizers are considered the least effective mounting style as they tend to rattle more and vibrate with the aluminum plate when typing. It’s possible to improve these stabilizers by modding them which we’ll get into later.
The stabilizers attach by clipping/snapping into the metal plate. This style of connection is not the most secure and adds to the overall amount of shaking and rattling.
You can remove these stabilizers by first removing the switch, then pressing on a small plastic tab on the stabilizer, while simultaneously lifting up on the stabilizer.
Screw-In Stabilizers
Screw-in stabilizers mount directly into the PCB and are attached with screws. This mounting style is considered the best because the stabilizers are much more secure and will vibrate less.
In addition, the screw-in stabilizers remain in place when taking off the key caps, unlike the snap-in style which tend to dislodge.
The PCB also tends to vibrate less than the metal plate, which makes it a better mounting location for the stabilizer.
Screw-in stabilizers are typically only found on custom-made keyboards and not on pre-built keyboards, which makes them less common, but highly sought after.
We highly recommend the screw-in stabilizer type if you plan on building a keyboard.
Snap-In Stabilizers

Snap-in stabilizers are another PCB mounted stabilizer type. They are better than plate-mounted, but not quite as effective as screw-in stabilizers.
Since snap-in stabilizers mount to the PCB, they tend to vibrate less than plate-mounted, which makes them a better option. The only downside is they are much less common than plate-mounted, and they are typically only found on custom keyboards.
Screw-in stabilizers are usually a better option than snap-in as they vibrate less and are more secure. The only situation where we would recommend this stabilizer type is if you can’t find a keyboard with screw-in stabilizers.
As mentioned before, snap-in stabilizers can pop out the PCB when trying to remove the keycaps, where screw-in stabilizers do not have this problem.
Different Brands that Make Cherry Style Stabilizers
There are a few main companies that manufacture Cherry stabilizers and they typically come in a variety of different colors and materials.
Durock Stabilizers

Our recommended stabilizers for your next keyboard build. These come pre-clipped and feel smooth.
Durock stabilizers are interesting because the stabilizer housing insert come in a nice translucent purple with a gold-plated stabilizer bar, if you’re feeling a little fancy. Perfect for building a keyboard with each component adding to the overall aesthetic.
These stabilizers are actually quite affordable considering how unique they look, which makes them an excellent option. We find them to be smoother than the standard GMK stabilizers.
Durock stabilizers only come in the screw-in style, so you can really only use them on a custom keyboard. All of the three sizes are available for purchase (2u, 6.25u, and 7u).
Durock stabilizers come pre-clipped, which mean the little feet on the bottom of the stabilizer housing are removed to make them more stable and improve the typing experience. Many people will do this manually to GMK stabilizers if they mod them.
We also recommend ordering these off of Prevail Key Co.
GMK

GMK is mainly known for their high-end keycaps, but they also produce genuine Cherry style stabilizers. This means they actually hold the tooling to make the “proper” Cherry stabilizers. If you have a keyboard with Cherry stabilizers, most likely they were produced by GMK.
GMK makes very plain and normal looking stabilizers, with a black stabilizer housing and insert, along with a grey metal stabilizer bar. You can get GMK stabilizers in all three mounting styles: plate-mounted, screw-in, and snap-in.
We typically order GMK stabilizers off of NovelKeys as they have them stock-in more often than other stores.
ZealPC
The most expensive stabilizers on the list ($30). Coming with a gold-plated stabilizer bar and clear housing, the ZealPC stabilizers have a design that can work with almost any colored keyboard (unlike the purple Durock stabilizers).
The stabilizers are pre-clipped which makes them rest on the PCB in a more stable fashion and improve the typing experience.
The ZealPC stabilizers are offered only in the screw-mount style, with a custom nut design to prevent stripping the threads.
It’s hard to recommend these stabilizers due to the super high price, when the Durock stabilizers are available with many of the same features at a fraction of the cost.
You can find these stabilizers on the ZealPC website.
Everglide
Everglide stabilizers come with a gold-plated stabilizer bar and clear housing, very similar to the ZealPC stabilizers. They are also pre-clipped, come in the screw-in style, and are a decent price.
These stabilizers come in all three sizes, or you can buy them as a package to save money depending on what size keyboard you have.
You can find them on the kprepublic website.
How to Improve Cherry Stabilizers
If you are willing to put a little extra work in, your Cherry stabilizers can benefit from some custom modifications, the most common being band aid, clip, and lube.
The band aid modification includes applying band-aids where the stabilizer insert hits the PCB to dampen the sound and create a much nicer acoustic.

Clipping the stabilizer feet makes the key feel more stable and less rickety. Many stabilizers come with the feet already clipped.
Lubricating the stabilizers reduces the friction when typing and makes them feel smoother and more consistent.
After these modifications, the stabilizers will feel much better and the difference will be night and day. I recommend everyone with the time and patience to try this mod out.
We have a couple guides on our site to walk you through these mods. Depending on if you have soldering equipment or not, there are few different methods:
Click test before and after modification
Conclusion
There is a lot of tribal knowledge in the mechanical keyboard community about stabilizers that everyone assumes you know already, so we hope this post laid out the information for you in a clear and easy-to-read format.
There is a lot of small complexities to sort through when picking out a stabilizer for you next mechanical keyboard. There are many stabilizer sizes, types, manufacturers, and mounting styles, not to mention all of the modifications.
For your first mechanical keyboard build, we highly recommend picking out a keyboard that supports screw-in Cherry stabilizers and going with the Durock or Everglide variations depending on which colorway/price works best for you. These two stabilizers offer the best bang-for-your-buck and offer a smooth, stable typing experience.
If you have a pre-built mechanical keyboard, you’ll usually be stuck with plate-mounted stabilizers (even if it’s hot-swappable). Screw-in and snap-in stabilizers are typically reserved for custom mechanical keyboards.
We also recommend taking the time to mod your stabilizers to improve them even more. A little bit of lubricant and band-aids goes a long way.
Happy Typing!